Bank Account Case Study
The Bank Account product line is used as a common case study for Software Product Line Engineering (SPLE). This tutorial illustrates the development process of Bank Account with Prices-IDE, starting from feature modeling, UML modeling, IFML modeling, model transformation, and product derivation.
1. Feature Modeling
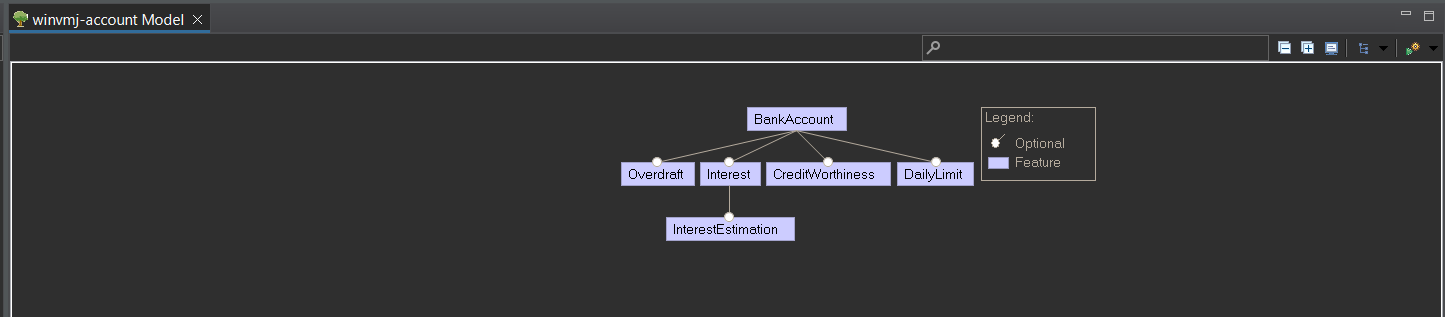
The first step in implementing the BankAccount Product Line is to create a feature diagram. A feature diagram is a tree-like structure that represents the features of a system and their relationships. It helps in understanding the variability and commonality of the product line.
- Create a New FeatureIDE project, choose WinVMJ as Composer. Check this Tutorial for more information.
- After setting up the project, open the modeling file (.uvl extension).
- Create the feature diagram by selecting the nodes then right click to select the desired operations.
2. UML-DOP Modeling
The second step is UML-DOP modeling. UML-DOP profile is an extension of UML that allows for the modeling of variability and commonality in software product lines using DOP. In this section, we will demonstrate how to model the UML-DOP diagram of BankAccount case study.
1. Create a New Papyrus Project
- In Eclipse, go to New > Other > Papyrus Project.
- Select Checklist UML.
- Enter the desired Project Name.
- Choose Checklist Class Diagram.
- Click Browse Registered Profiles and select UML-DOP Profile.
- Click Finish to complete setup.
2. Create a UML-DOP Diagram
- After setting up the project, open the modeling file (.di extension).
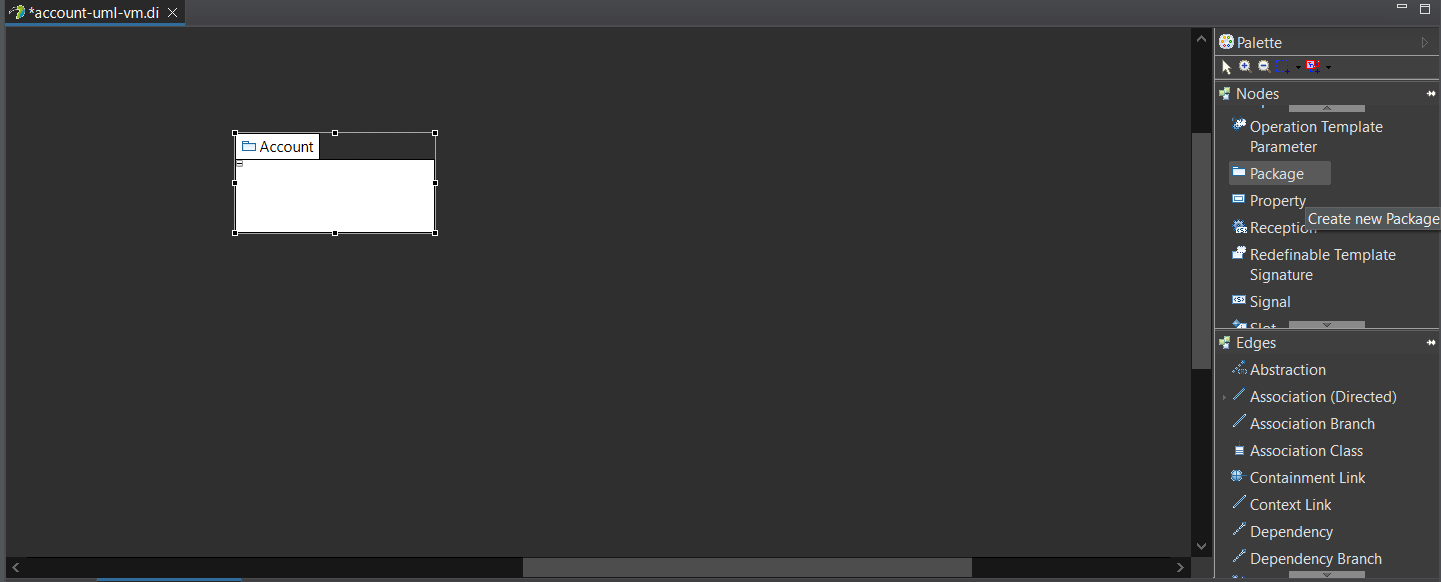
- Start with creating a package.
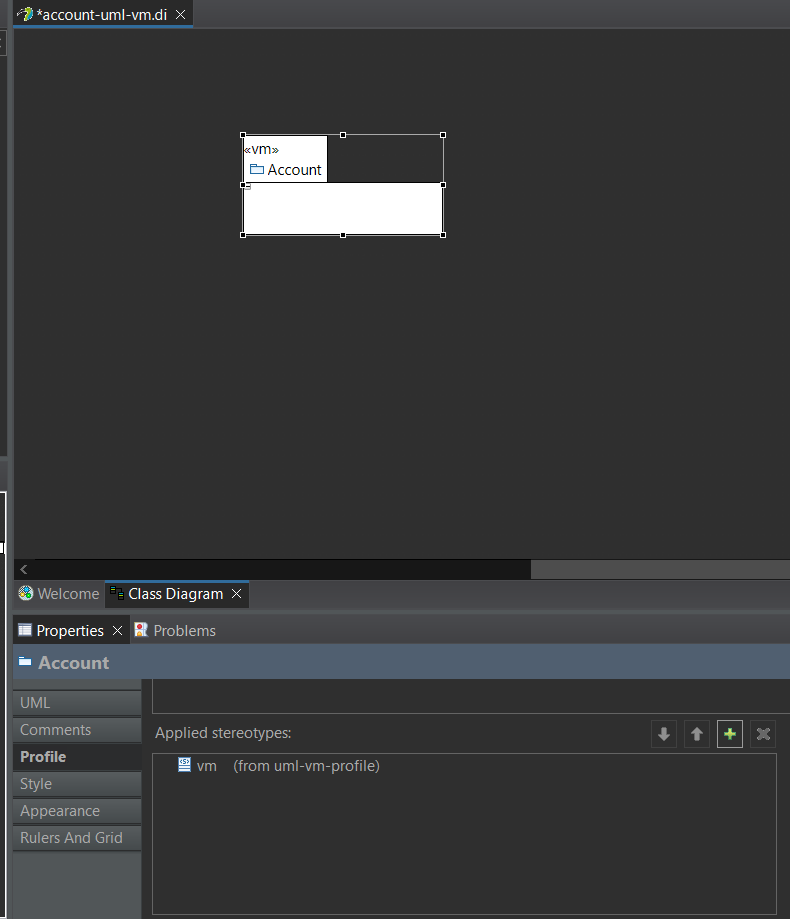
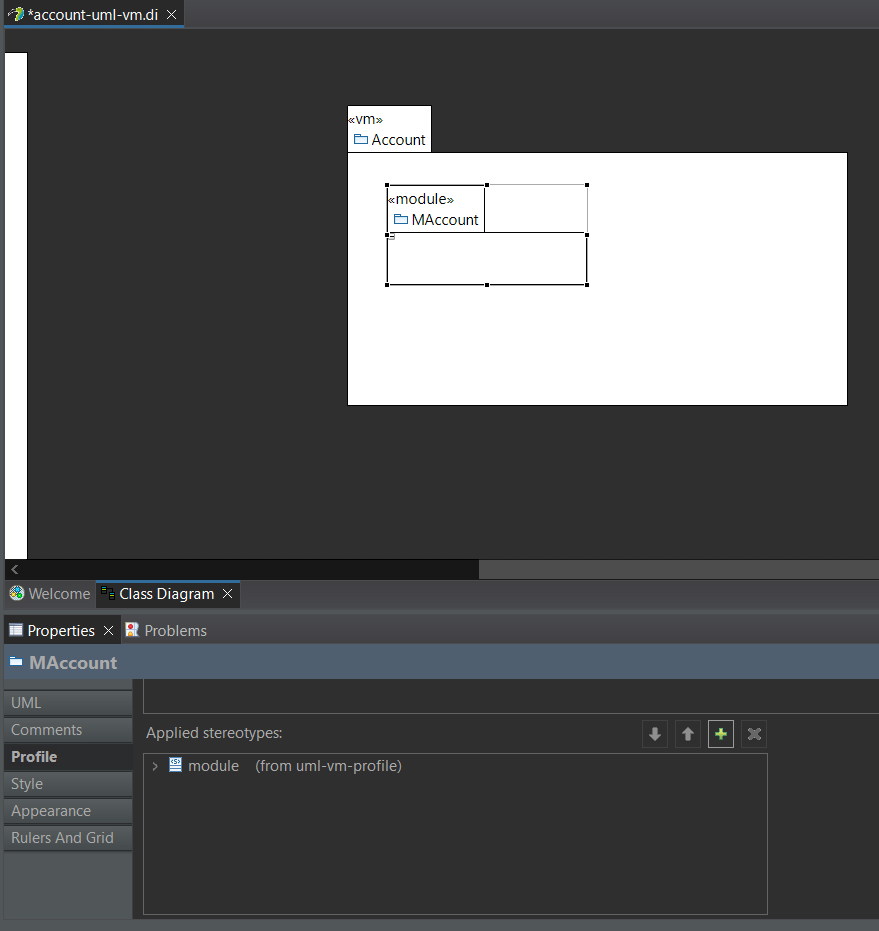
- Add the «vm» stereotype to the package.
- To create a core module, add a package with stereotype «module». The package name should be prefixed with M (e.g., MXyz, MAbc, etc.)
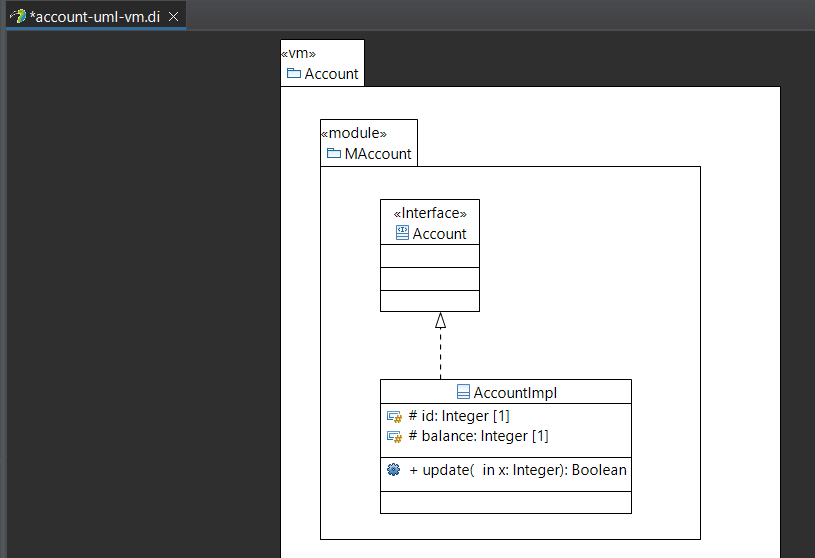
- Add interfaces and classes, properties, and operations to the package. The class should implement the interface using the Interface Realization. The class name should be in form of InterfaceNameImpl (e.g., AbcImpl, XyzImpl).
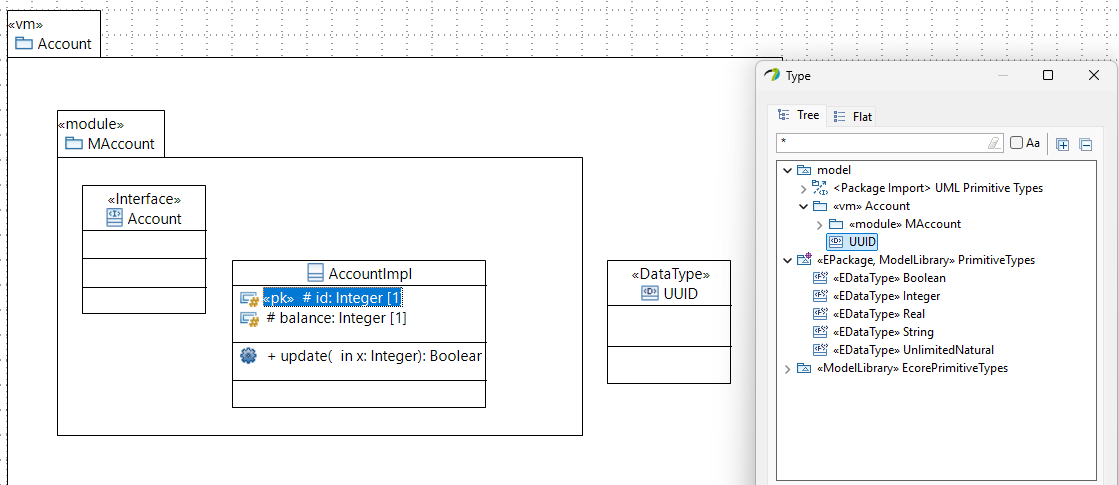
- To add a primary key to a class, use the «pk» stereotype on the property that should act as the primary key.
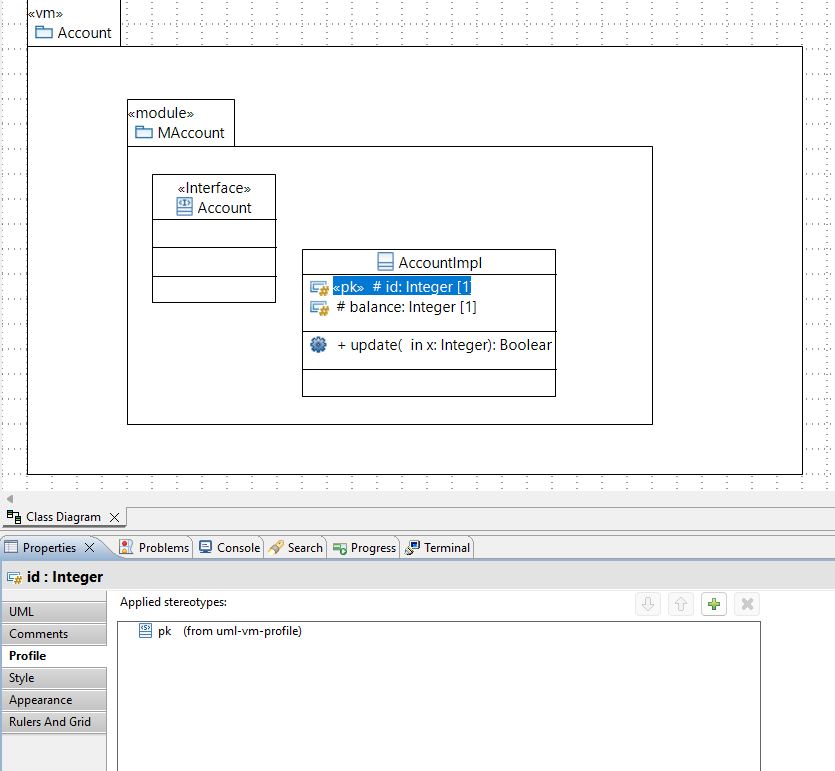 Optionally, you can add UUID as datatype and then you can apply it like the following.
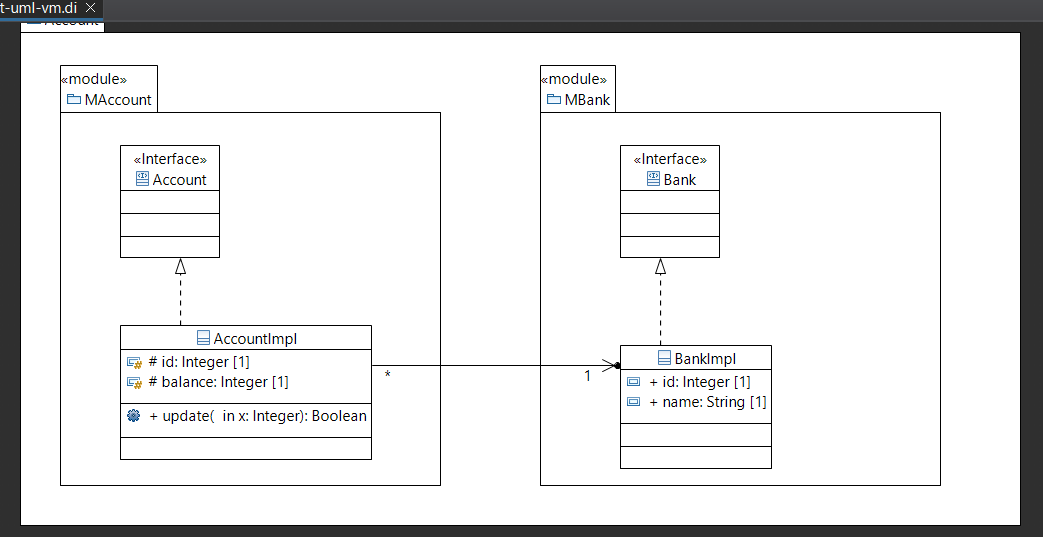
 - Relation between classes can be made using the Association (Directed) edge.
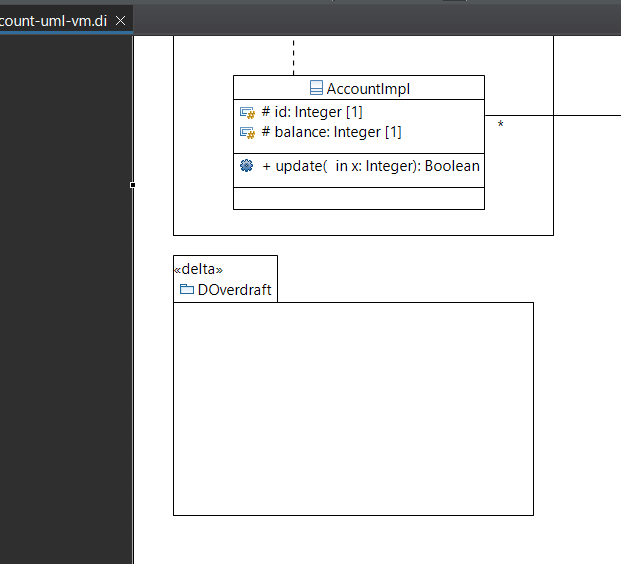
- To create a delta module, add a package with stereotype «delta». The package name should be prefixed with D (e.g., DZyx, DCba, etc.)
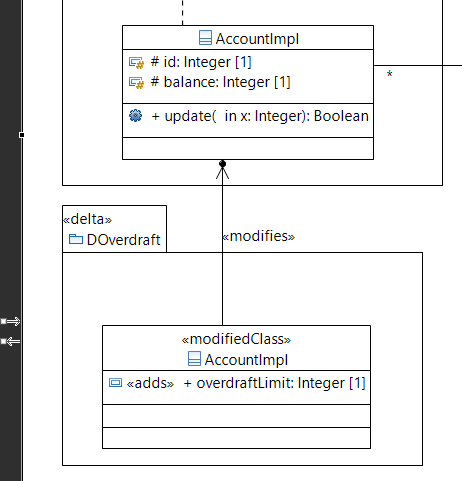
- To create a class modification, create a class with stereotype «modifiedClass». Add a relation using the Association (Directed) edge with stereotype «modifies» between the class in the delta module and core module. Add properties or operations with stereotypes to model the modification of the class.
3. Generate WinVMJ
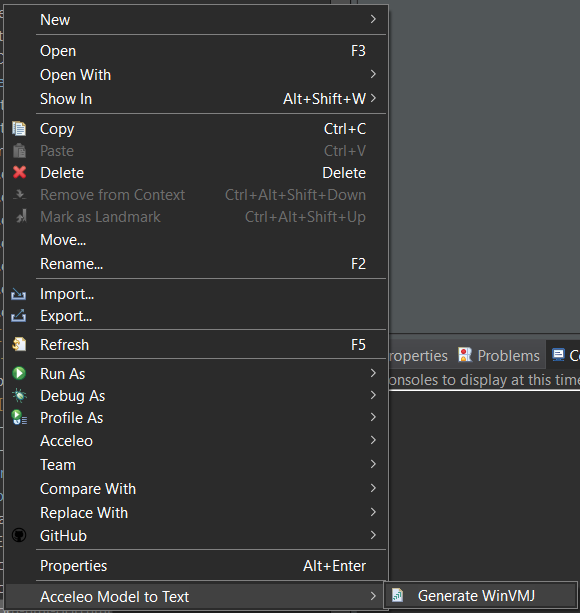
- Right-click on the UML model within your project.
- Select Acceleo Model to Text from the context menu.
- Click Generate WinVMJ.
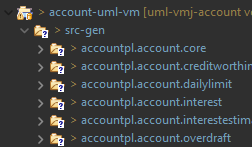
- Check the src-gen folder in your project; the WinVMJ files will be generated here.
- To use these modules in WinVMJ Project, copy the src-gen folder contents into the modules directory of your WinVMJ Project.
4. WinVMJ Composer
After generating the WinVMJ files from the UML-DOP model, the next step is to use the WinVMJ Composer to derive specific products from the BankAccount product line. This involves selecting features and composing the corresponding modules to create a tailored application.
- Open your WinVMJ Feature Modeling project from earlier.
- Ensure that the generated modules from the UML-DOP model are placed in the modules directory of your WinVMJ project.
- Data Seeding for Bank Account Case Study
- To generate a product, follow these steps:
- Open feature_to_module.json and add the module names to the respective features.
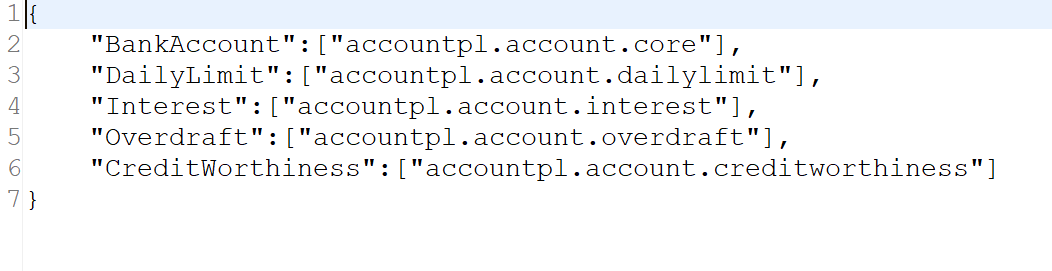
- To add another dependency, there is a build.gradle file in the project root. You can add the dependency there.
- The configuration is defined in the directory configs.
- Right click on the project, then select NEW -> OTHER -> FeatureIDE -> Configuration File.
- Define the configuration file's name to represent the product's name.
- Select the required features, then right click on the configuration file and choose FeatureIDE -> Set As Current Configuration.
- To compile, follow these steps:
- Right click on the src directory.
- Select FeatureIDE > WinVMJ > Compile.
- Check the WinVMJ Console to monitor the compilation process.

The compiled application will be placed in the src-gen directory.
- There are two methods to run the generated product:
- Without data seeding (.sql file):
-
Right click on the project, then select Show In > Terminal
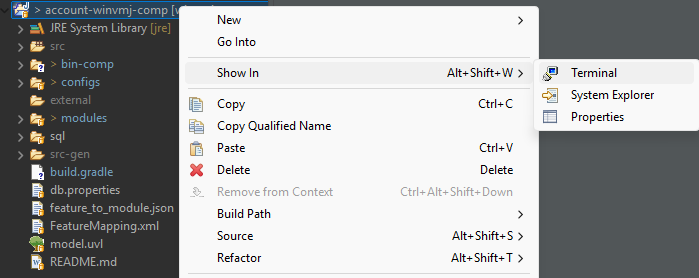
- In the terminal, type ./gradlew runWinVMJNoSQL
-
Right click on the project, then select Show In > Terminal
- With data seeding (.sql file in sql folder):
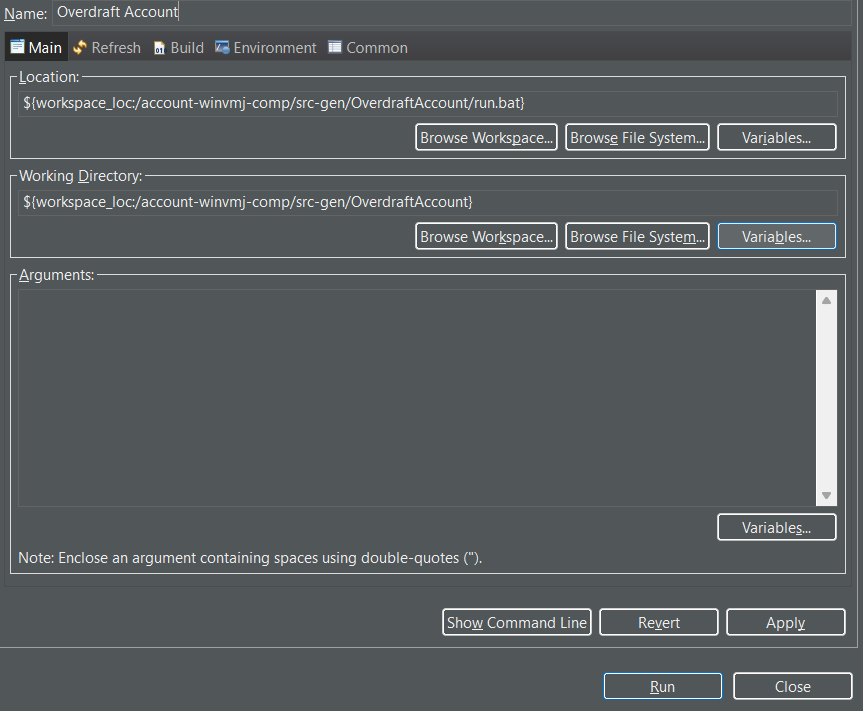
- On the top toolbar, click on Run > External Tools > External Tool Configuration.
- Click on Program > New Configuration.
- Set the script location to src-gen/[Product Name]/run.bat (Windows) or src-gen/[Product Name]/run.sh (Linux / Mac).
- Set the working directory to src-gen/[Product Name]/.

- Without data seeding (.sql file):
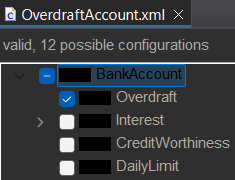

Generated modules are available in the src directory. If the generated modules do not appear, ensure you have generated the modules from the UML and placed them in the modules directory.
5. IFML Modeling: Bank Account
The next step is to create an IFML diagram as the frontend model of the Bank Account. We will create the core modul and also the delta modul of Bank Account. More info: IFML-DOP-Modeling-Guideline.
Create a New IFML Project
-
Create a New Modeling Project
- Right-click on the Model Explorer.
- Select New → Modeling Project.
- Enter the project name, then click Finish.
- The new project will appear in the Model Explorer.
-
Integrate IFML with UML (Bank Account)
- IFML models can be integrated with UML models for a complete application specification.
- Locate your UML-DOP model for the Bank Account case.
- Copy the
.umlfile into the IFML project folder. - If the file does not appear, right-click the project and select Refresh.
-
Create a New IFML File
- Right-click on the project folder.
- Select File → New → Other.
- In the filter bar, type core.
- Select Core Model, then click Next.
- Enter the file name (e.g.,
main.core), then click Next. - Select the UML file added in Step 2, then click Finish.
-
Activate the Diagram Editor
- The
.corefile should now be visible in your project. - Right-click the project and select Viewpoints Selection.
- Enable both IFML_Core and IFML_DOP_Extension, then click OK.
- The
Important Naming Convention
Some components require specific naming conventions to work properly.
- Feature menus must use the exact feature name.
-
List components must start with:
Table→ for table-based viewsList→ for card/list views
-
The Home page must be a ViewContainer named exactly
Homewith annotation/. -
IFML Action naming must follow:
call/[feature]/[operation].
Create IFML Diagram: Home Page
-
In the project view, expand the
.corefile. - Right-click on the IFML model, then select New Representation → New IFML Diagram.
- The diagram editor will open, and you can start building your IFML diagram.
- You can visit IFML DOP Modeling Guideline here: IFML DOP Modeling Guideline
- First, we will edit the main.core model. This model will contain the Home Page and Menu for Navigation, and act as the core IFML for the Bank Account product-line.
- Model the Home View Container for the homepage. Please make sure the name is exactly Home and check the Is XOR in the properties section.
- The home page should also have the base URL using annotation "/" by right-clicking the View Container and add the annotation.
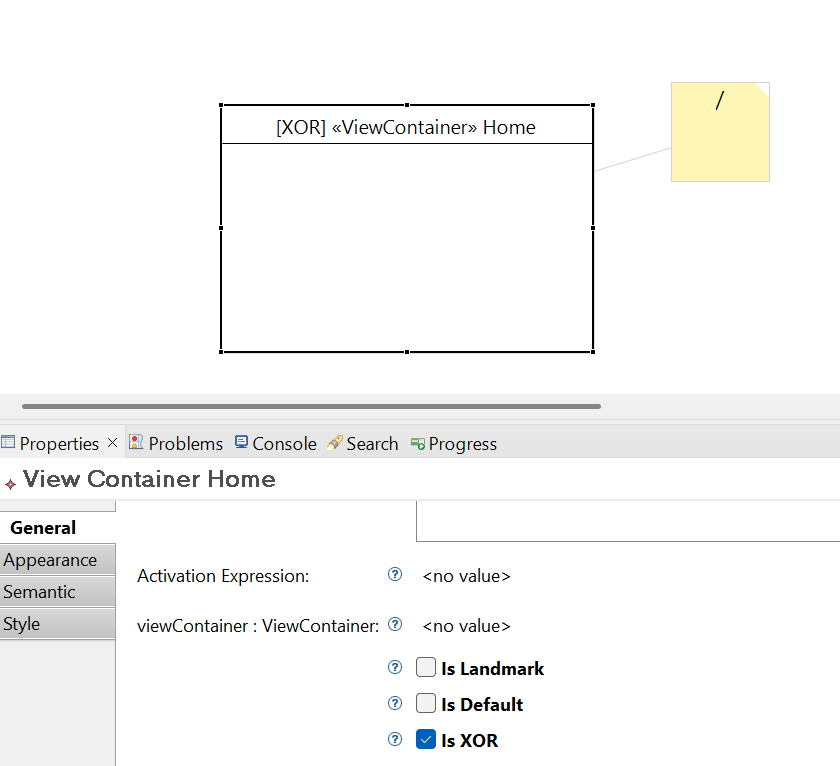
Create Account Page
- Create a new .core file in the project (e.g. bankaccount.core). Follow these steps to create the .core file. This file will act as the core module for the Bank Account product line.
-
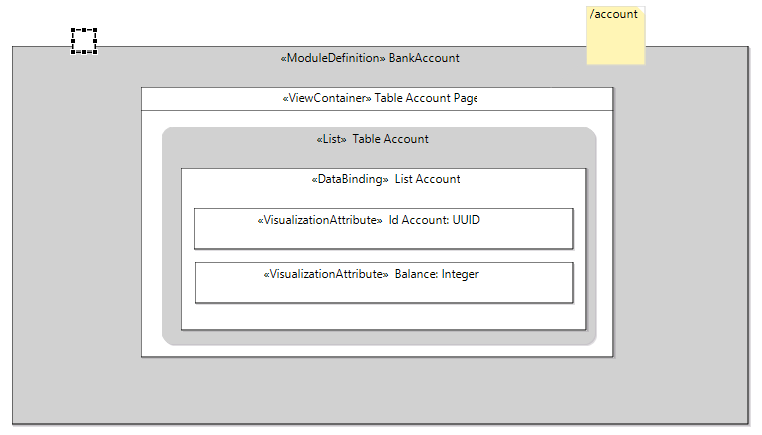
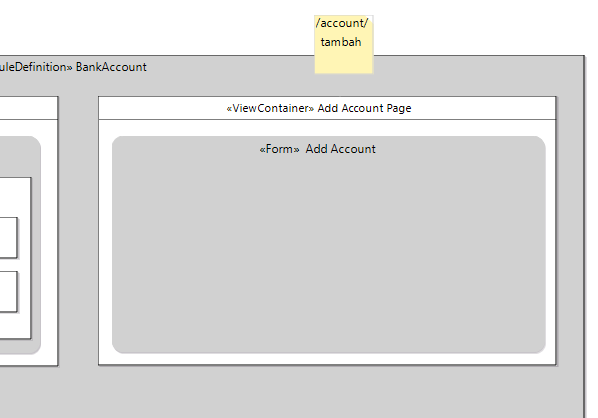
Create a Table Account View Container and fill it with a
List and DataBinding that
call the backend API. Make sure the View Container name starts
with "Table". In the same View Container, add the annotation
"/account" to define the page URL.
![BankAccount ModuleDefinition]()
-
Create Table Account View Container and fill it with
List and DataBinding that
call backend API.
![Account Table]()
![Data Binding]()
-
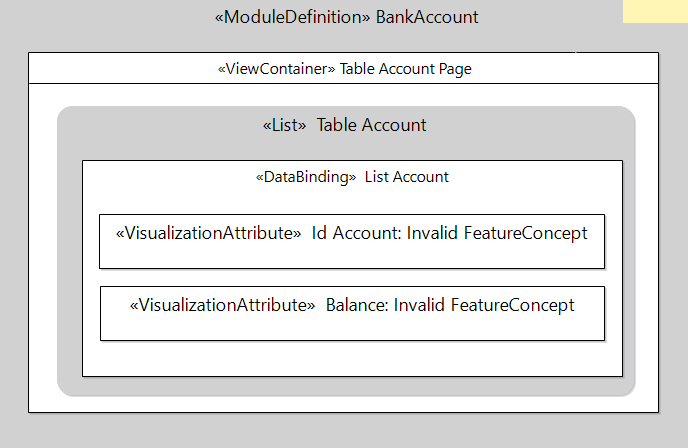
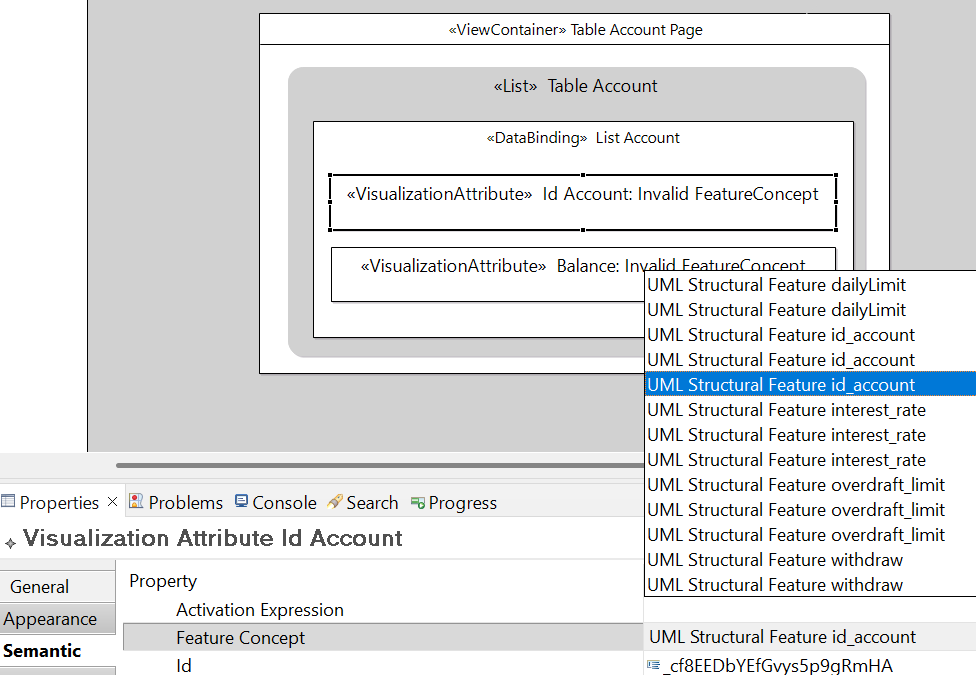
Add a Visualization Attribute to display the
data. This component needs to be added inside the DataBinding.
Go to Properties > Semantic and select the
feature concept based on the UML model.
![Visualization Attribute]()
![Semantic Properties]()
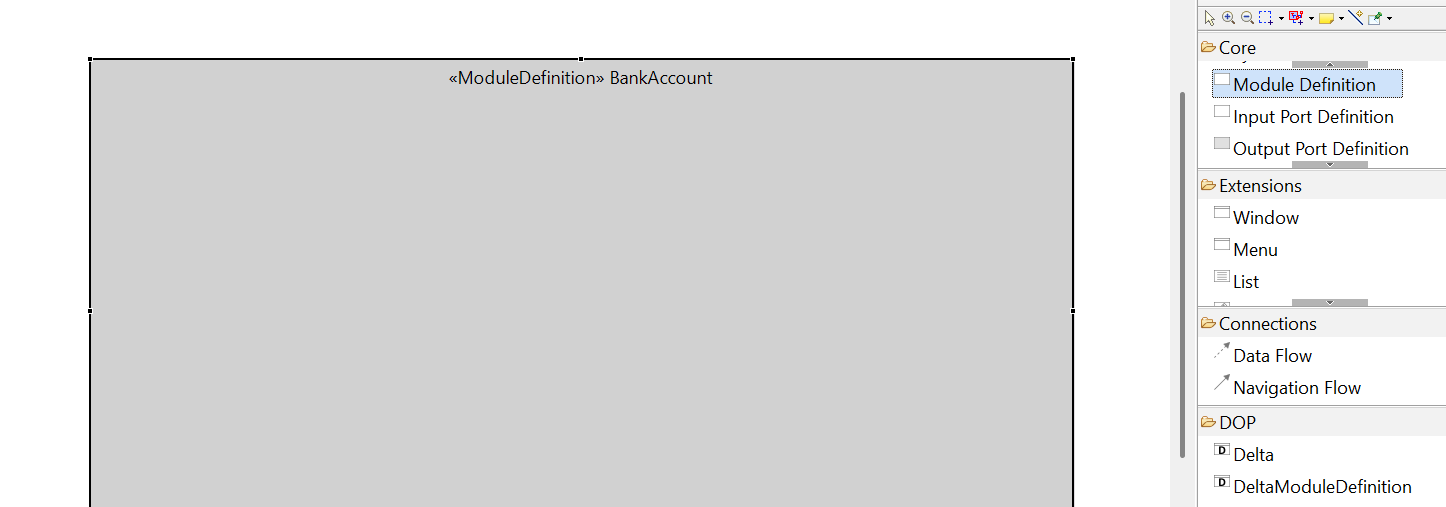
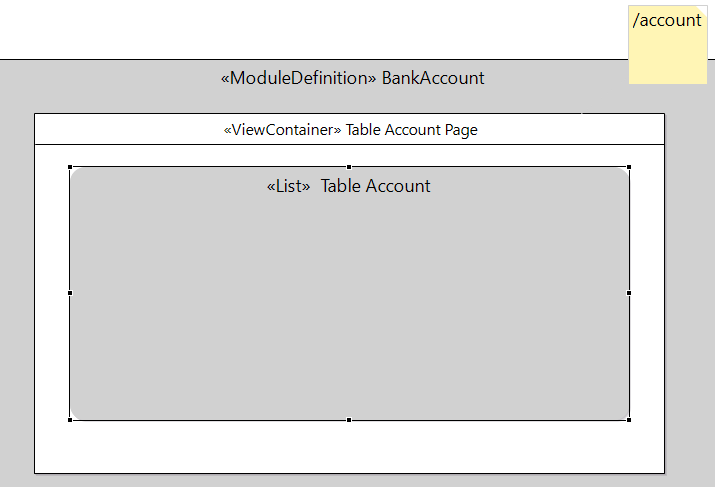
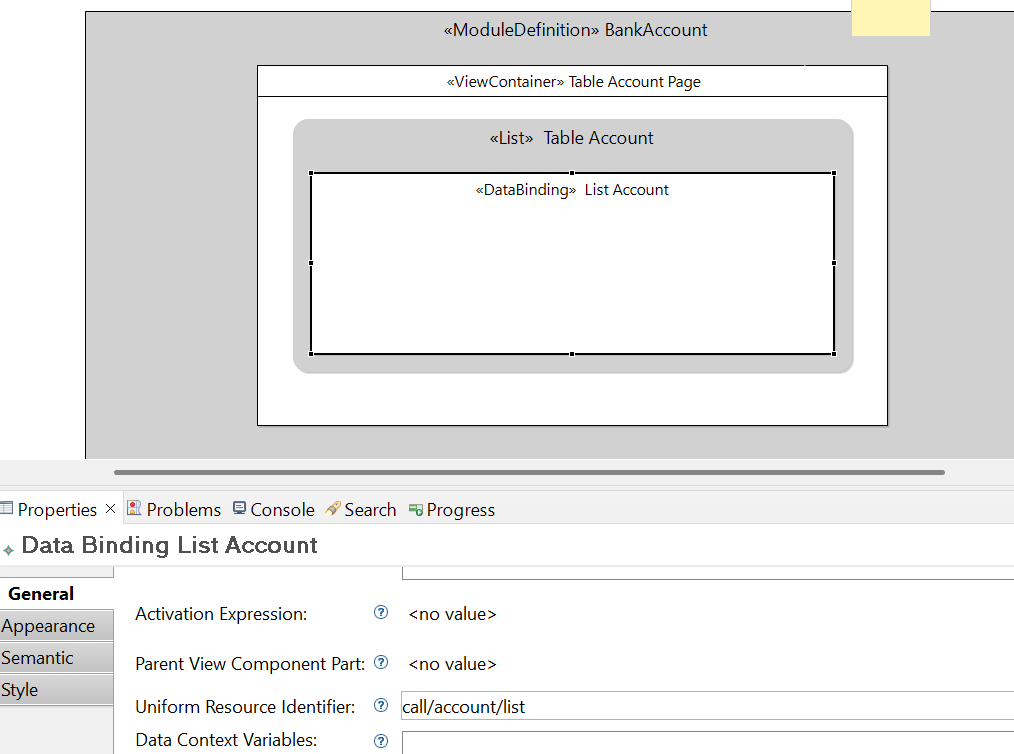
Create Navbar
-
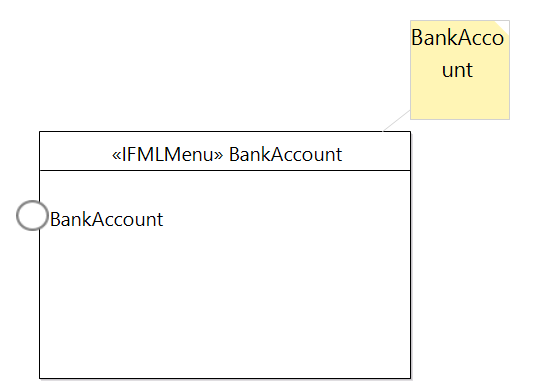
Open file main.core and add an IFML Menu for BankAccount to for the navigation to
"BankAccount" Page. Add the annotation of the feature's
name (BankAccount) and the ViewElement Event of the BankAccount.
⚠ Note: The menu and annotation name should exactly match the feature name.
![IFML Menu]()
-
Add Input Port Definition to define the
modeling interaction points from outside the ModuleDefinition.
![Input Port Definition]()
-
Integrating the Module into the Main Core:
- Double-click the main.core
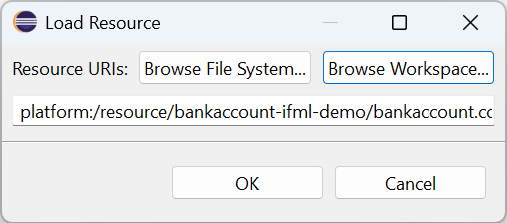
- Right-click on Resource Set. Then, select Load Resource > Browse Workspace.
-
Select bankaccount.core.
![Load Resource Window]()
-
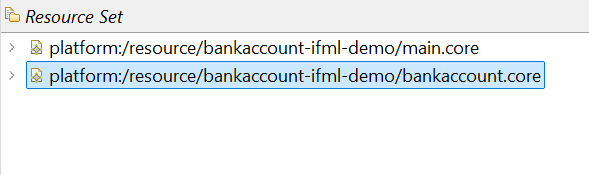
The result should look like this:
![Integrated Module Result]()
⚠ Note: This is just an example. Later, you will need to load resources not just in the main module but also within other modules if you use multiple modules. -
Integrating IFML Menu:
- Integrate the IFML Menu at main to Port Definition manually via navigation flow.
-
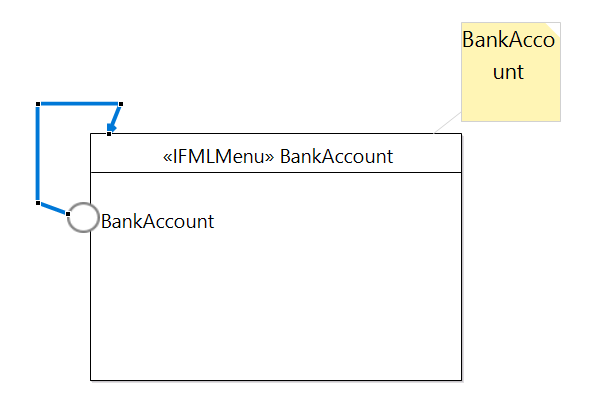
Create the navigation flow in IFML Menu back to itself.
![Navigation Flow]()
-
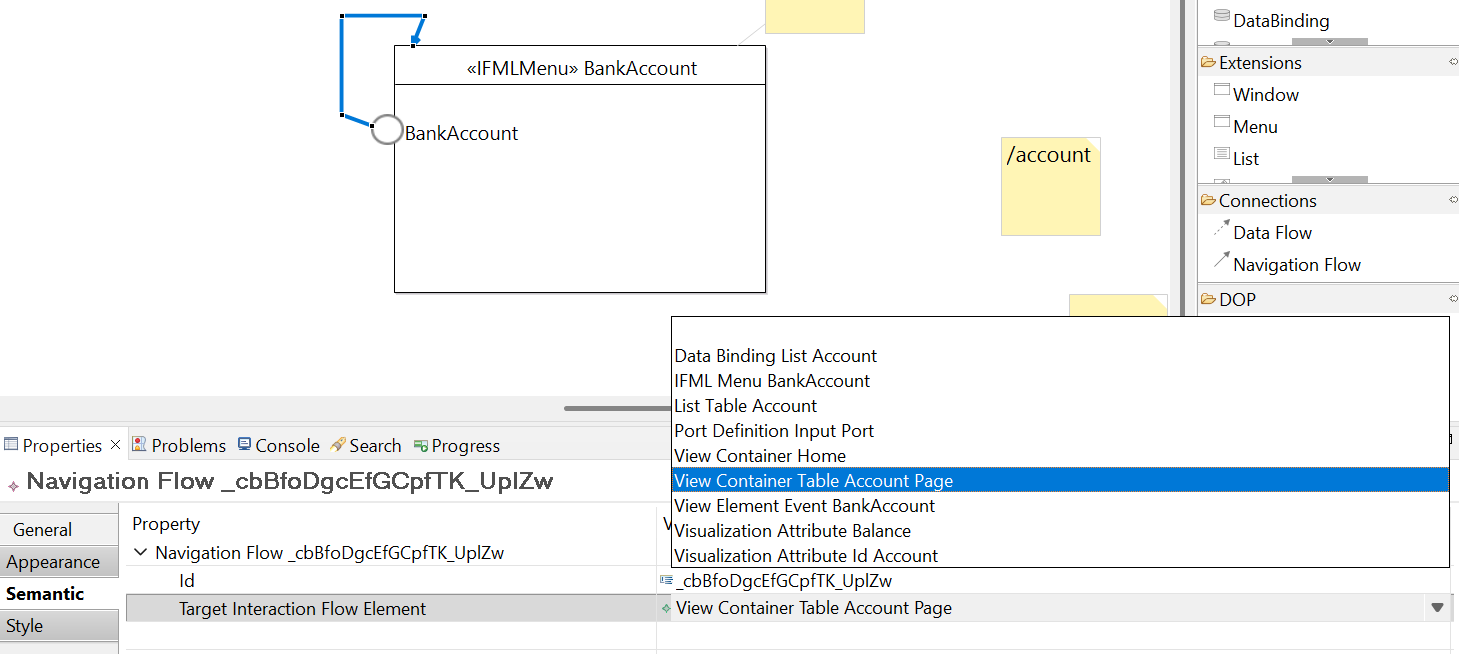
Change the target element in main.core tree to Port
Definition: ViewContainer Table Account Page
![Target Port Definition]()
⚠ Note: Once the target element is added, the navigation flow will disappear from the visual editor. Don't worry, the navigation flow is still present in the .core file (check by double-clicking the ViewContainer Menu in the main.core file). - Now, you can generate the UI from main.core using the plugin. Check the Generate UI tutorial.
Create Form Page
-
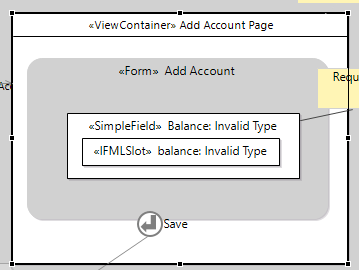
Inside the BankAccount page, create a new View Container and
fill it with Form.
![View Container and Form]()
- Next, fill it with Simple Field for the form's field, for example Balance.
-
Inside the Simple Field, add IFML Slot. For
marking required field, add annotation "Required".
Note that the IFML slot name should match the field name in UML class diagram.![Slot and Annotation]()
-
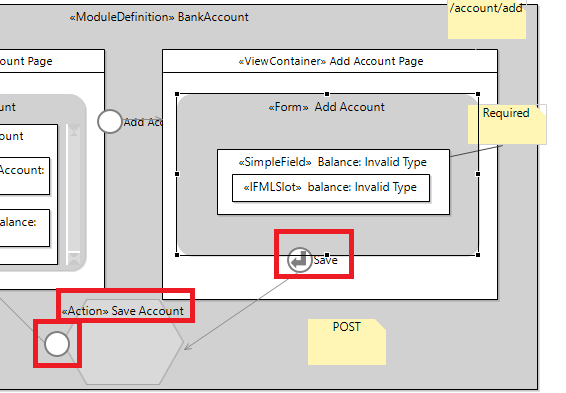
For submitting the form, create IFML Action "Save Account" inside the
BankAccount View Container with annotation "POST".
Note: The first word in the Action name is the path to the backend API you want to call. The next word contains the feature name of the IFMLAction. Currently, the backend API has the pattern call// . For example, an IFMLAction named "Save Account" which calls the backend API called call/account/save. - On the Form, add On Submit Event "Save"and attach it with Navigation Flow to the IFML Action "Save Account".
-
Lastly, add Action Event "Save" into IFML Action and add Navigation
Flow to View Container "Table Account Page".
![Complete IFML Action]()
-
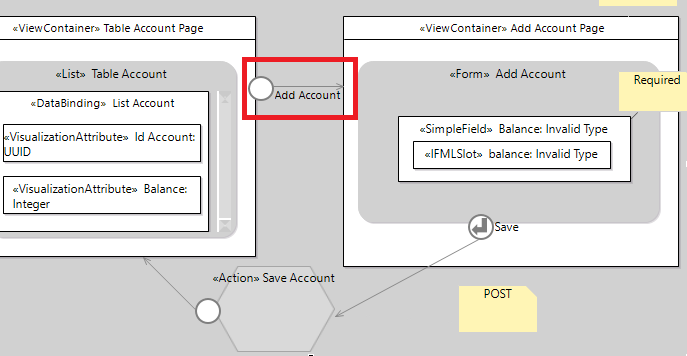
To allow access to the form page from the Account Page, add
View Element Event and navigate it to Form
Page.
![Navigation to Form]()
Transfer Parameter
- To create a detail page or an edit form page, the account ID is needed, so it needs to be passed from the list page.
-
First, create a new View Container for Account Detail. Set
annotation to
/account/:id_accountand DataBinding to callcall/account/detail.![Detail Account]()
-
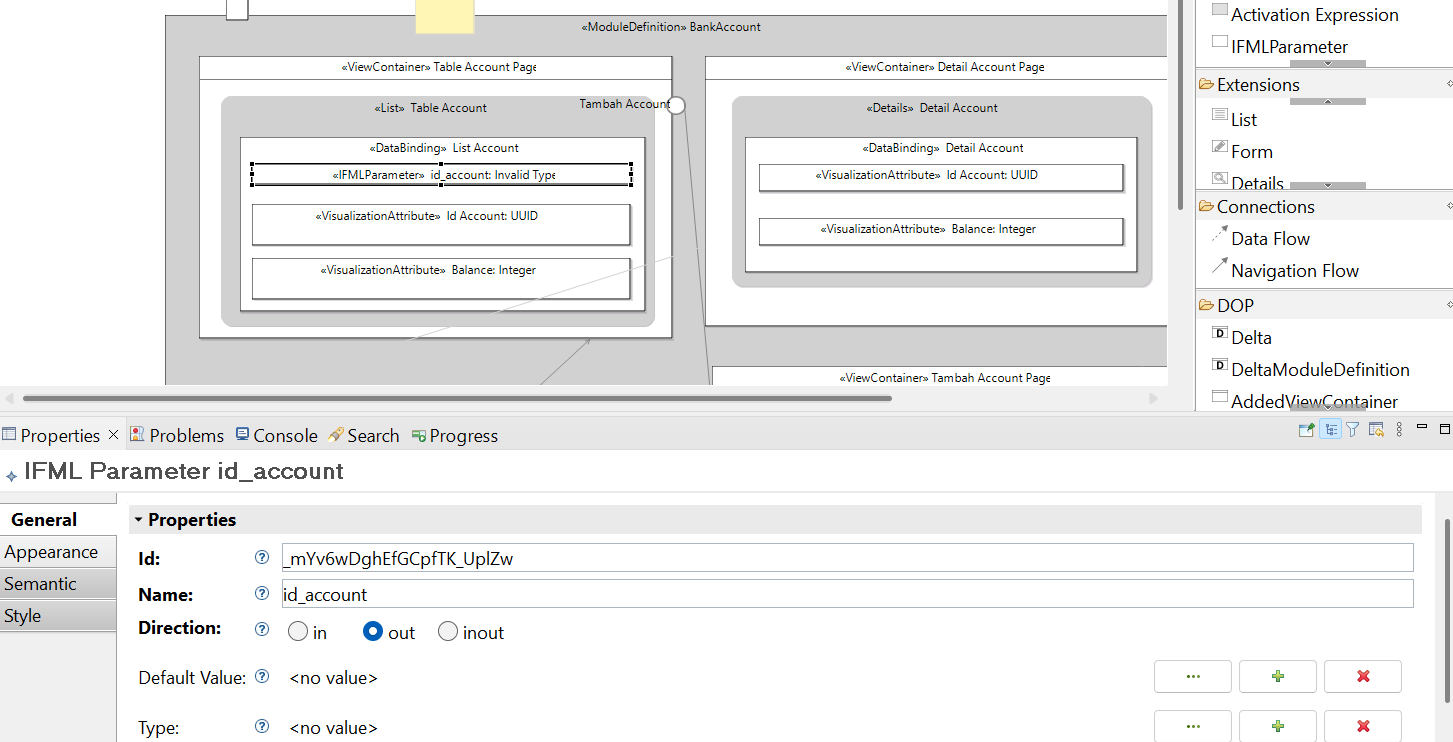
Next, create IFML Parameter with the name "id_account" inside
the Account Page Data Binding and set the direction to
out. In the Detail Page, create IFML
Parameter with the same name and set the direction to
in.
![IFML Parameter]()
-
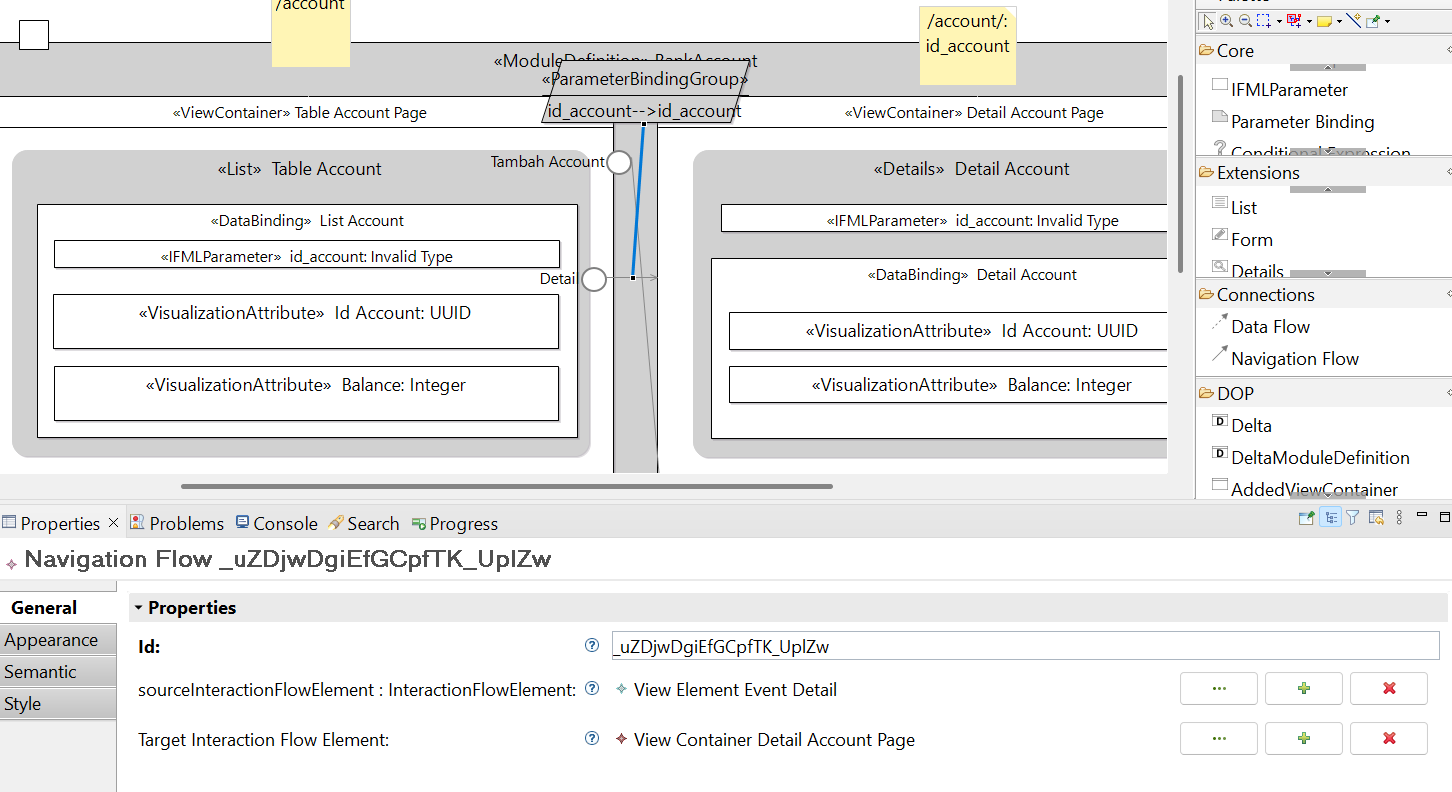
To transfer the parameter, create a Navigation Flow to Detail
Page and create Parameter Binding Group by right-click on it.
Fill it with Parameter Binding and set the source and target
value to the IFML Parameter.
![Parameter Binding Group]()
- By doing this, the data shown on the Detail Page should be the data from the selected account. The steps also apply to delete item and update item.

Create Delta Module (Overdraft Page)
-
Create a Delta (for variability features such
as Overdraft inside the ModuleDefinition) as
overdraft.core -
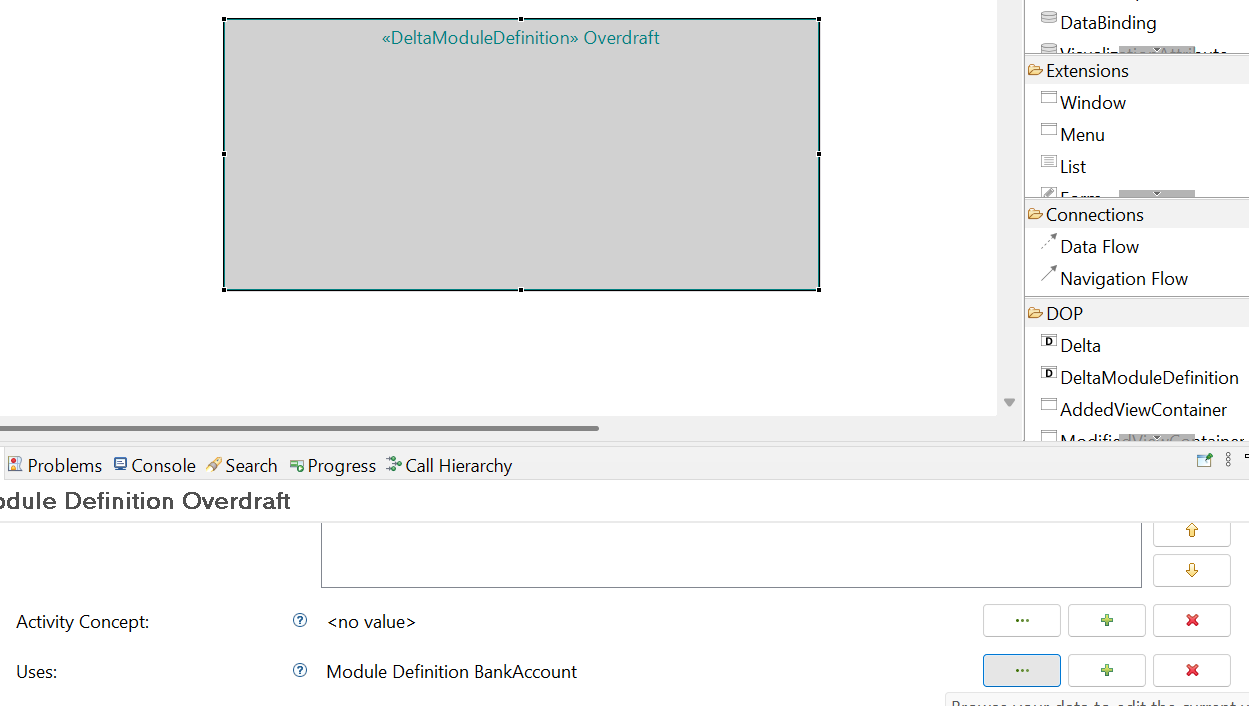
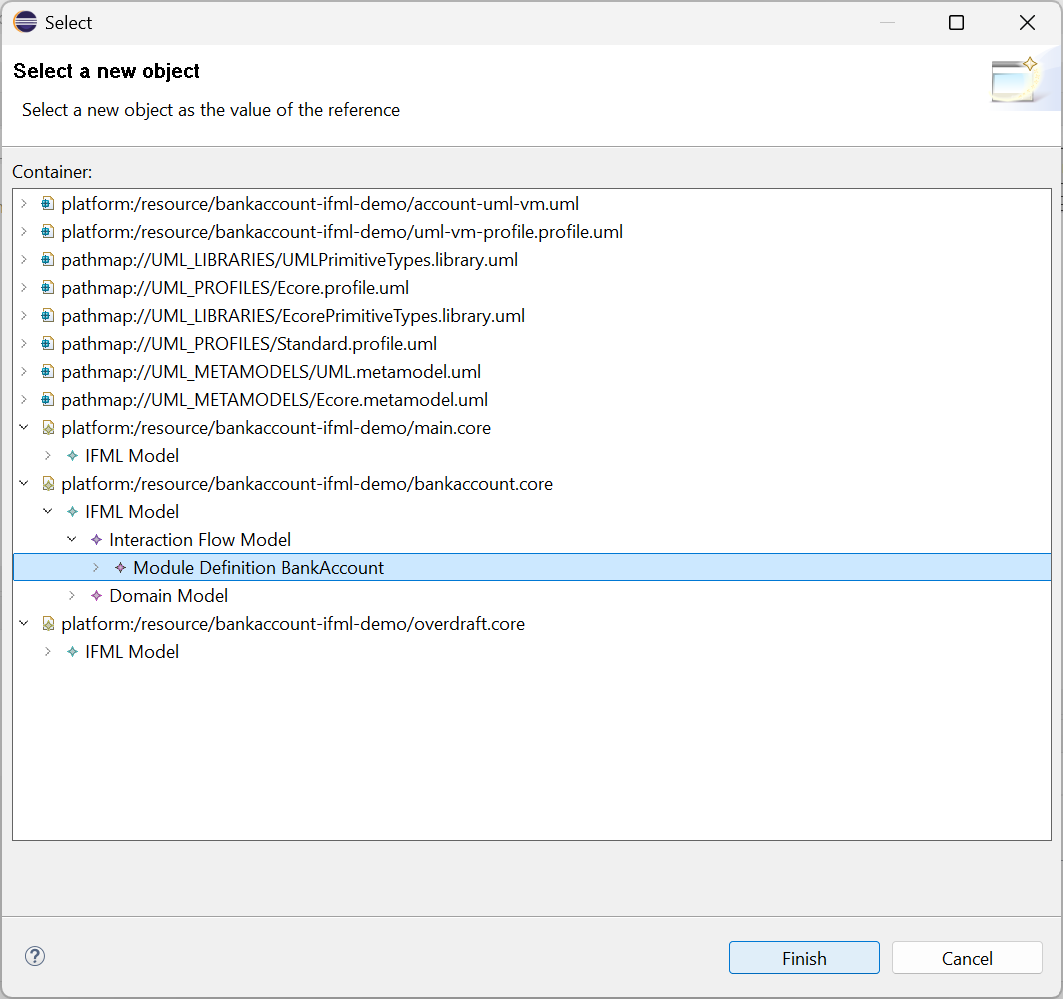
Inside the Overdraft, create a new
DeltaModuleDefinition named
Overdraft and set the
Uses variable to the targeted
ModuleDefinition (BankAccount).
![DeltaModuleDefinition]()
![Delta Uses parameter]()
-
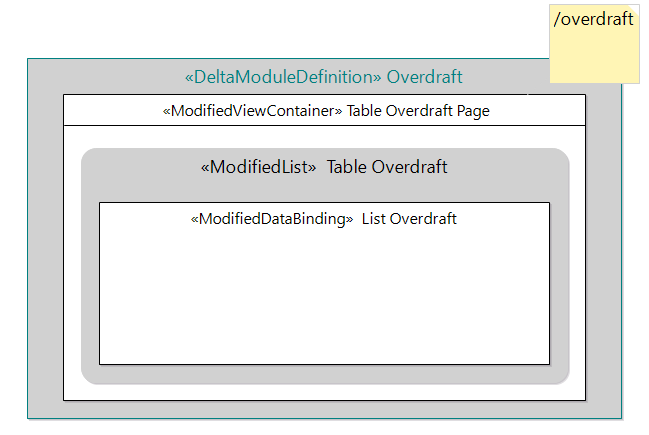
Next, create a new ModifiedViewContainer and
make sure to fill the Uses variable (View
Container Table Account Page). Also add an annotation
/overdraftfor the URL.![Delta Overdraft]()
-
Follow the same steps you used to create the Account Page
(Table + List + DataBinding + Visualization Attribute) but use
the DOP extension instead. Make sure to also
input the modifies value for all elements.
![Modifies Table]()
-
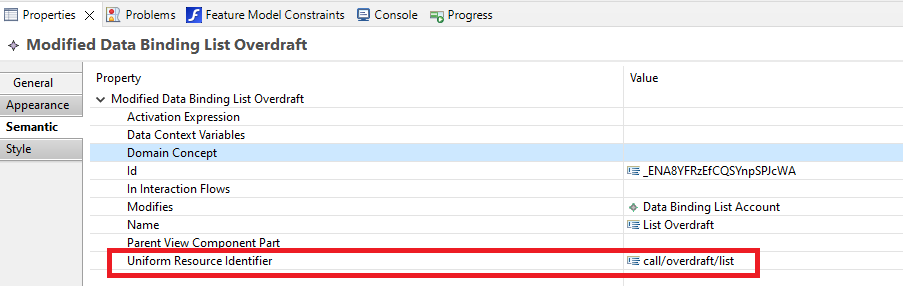
For ModifiedDataBinding element, add the new backend endpoint. Open Semantic section on Properties, fill
call/overdraft/list value to the Uniform Resource Identifier (URI)
![Modifies URI]()
-
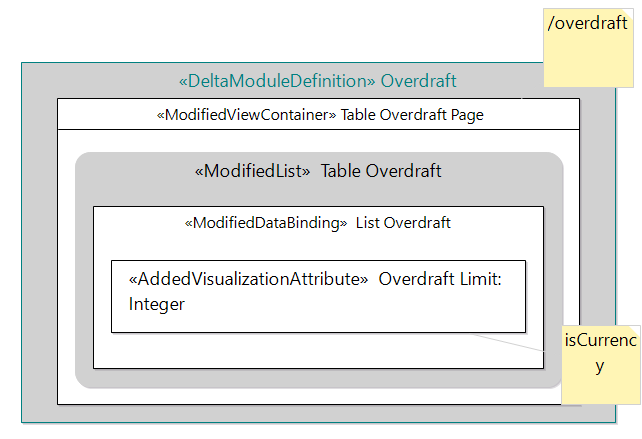
Add a new Visualization Attribute Overdraft Limit. Connect to Feature Concept in the UML class diagram and you can also add
annotation isCurrency.
![Added Visualization Attribute]()
- Double-click the main.core. Right-click on Resource Set. Then, select Load Resource > Browse Workspace. Select overdraft.core.
- Add a new IFML Menu Overdraft to main.core. Add an annotation Overdraft, ViewElementEvent Overdraft and NavigationFlow to the ModifiedViewContainer Table Overdraft Page. Follow the same steps to add Menu, ViewElementEvent, and NavigationFlow used earlier.
- To include the Overdraft feature in the product generation, add Overdraft in the SelectedFeature of your generated (React) project.
-
Go back to the IFML Project, right click on the
main.coreand Generate the UI.

6. Generate Java Script Application
The last step is to generate the JavaScript application from the IFML model. This can be done using the Prices-IDE plugin for IFML to JavaScript transformation. More info on this can be found in the Generate UI tutorial.