IFML-to-React UI Generator Plugin Tutorial
Welcome to the IFML-to-React UI Generator Plugin tutorial. Follow these steps to use the plugin effectively.
Plugin Installation
- On the top toolbar, click Help → Install New Software.
- In the "Work with" field, add https://amanah.cs.ui.ac.id/priceside/ifml-ui-generator/staging , click Add, and save with the name IFML UI Generator.
- Open the drop-down menu and select IFML UI Generator update site.
- Select IFML UI Generator, click Next, approve all licenses, and click Finish.
Starting the IFML Project
1. Create a New Modeling Project
- Right-click on the Model Explorer.
- Select New > Modeling Project.
- Enter the project name and click Finish.
- The new modeling project will now appear in the Model Explorer.
2. Integrating IFML with UML
- You can integrate the IFML model with a UML model for a complete application specification.
- Download the sample UML file.
- Place the UML file in the project folder.
- If the UML file doesn't appear in Eclipse, right-click on the project and click Refresh.
3. Create a New IFML File
- Right-click on the project folder.
- Select File → New → Other.
- In the filter bar, type core.
- Choose Core Model and click Next.
- Enter the file name, click Next.
- Select the UML file added in step 2, click Finish.
4. Activate the Diagram Editor
-
The
.corefile should now appear in your project. - Right-click on the project and select Viewpoints Selection.
- Select both required Viewpoints (IFML_Core and IFML_DOP_Extension) and click OK.
5. Create an IFML Diagram
-
In the project view, expand the
.corefile. - Right-click on the IFML model, then select New Representation → New IFML Diagram.
- The diagram editor will open, and you can start building your IFML diagram.
- You can visit IFML DOP Modeling Guideline here: IFML DOP Modeling Guideline
Important Naming Convention
For some components, a certain naming should follow to make it works. Check the IFML DOP Modeling Guideline: IFML DOP Modeling Guideline
- To create the Feature Menu, the IFML Menu name should follow the feature's name.
- To create the List component, the naming should starts with "Table" for table type or "List" for the card list type.
- To create the Home Page, create a ViewContainer with the name exactly "Home" and an annotation "/".
-
IFML Action naming should follow the backend API. Current API
pattern is
call/[feature name]/[parameter]. For example, to call call/bankaccount/save, the IFML Action name will be "Save Bank Account".
IFML Modeling: BankAccount
In this section, we will demonstrate how to model the IFML diagram of the BankAccount case study.
Create home page
- First, we will create the main.core model. This model will contain the Home Page and Menu for Navigation, and act as the core IFML for the Bank Account product-line.
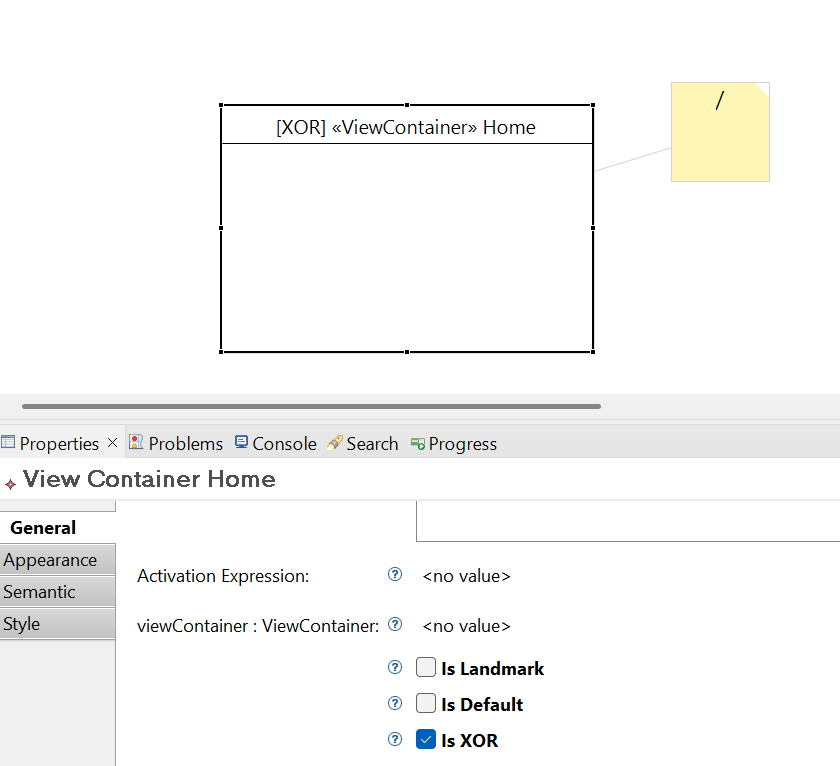
- Model the Home View Container for the homepage. Please make sure the name is exactly Home and check the Is XOR in the properties section.
- The home page should also have the base URL using annotation "/" by right-clicking the View Container and add the annotation.
Create Account Page
- Create a new .core file in the project (e.g. bankaccount.core). Follow these steps to create the .core file. This file will act as the core module for the Bank Account product line.
-
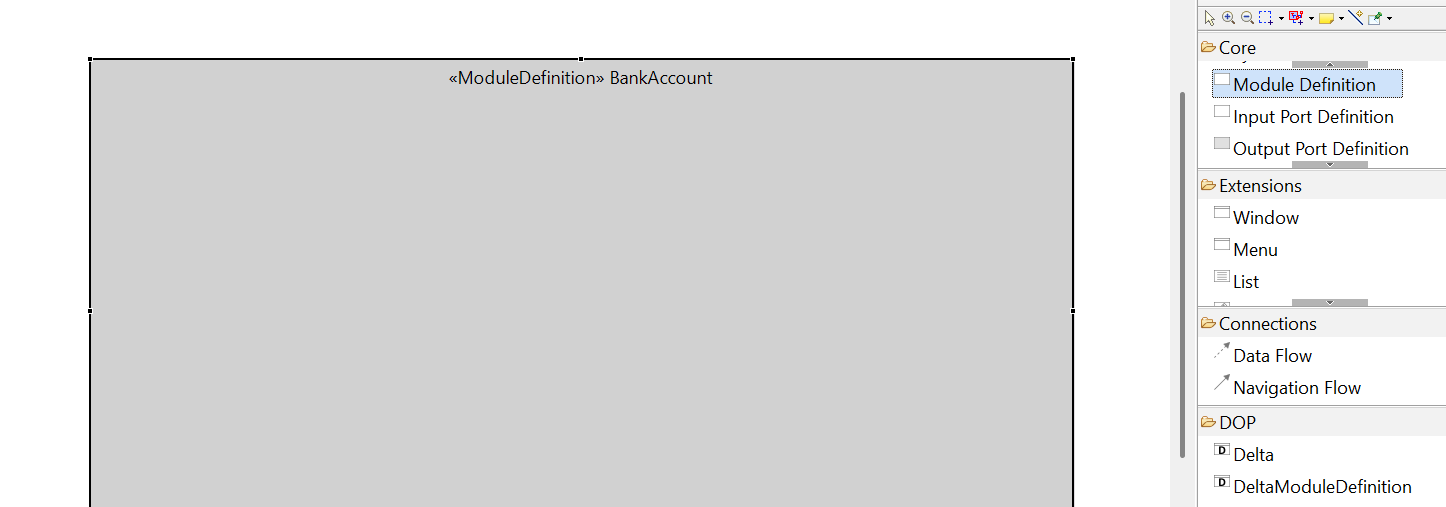
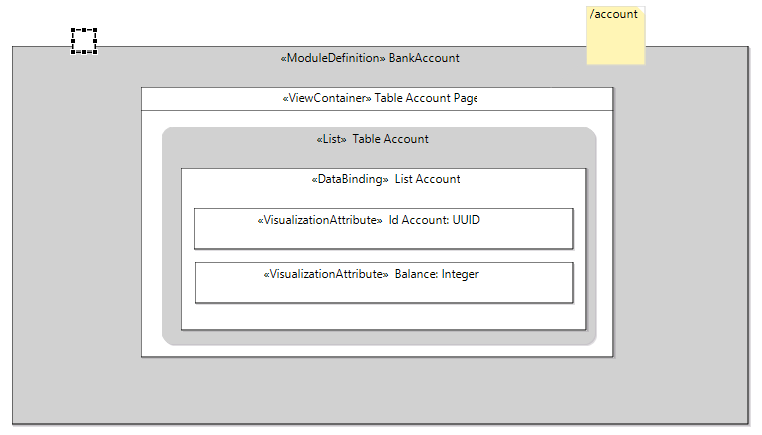
Create a new ModuleDefinition for the
BankAccount module. Ensure that the
ModuleDefinition name matches the feature
name.
![BankAccount ModuleDefinition]()
-
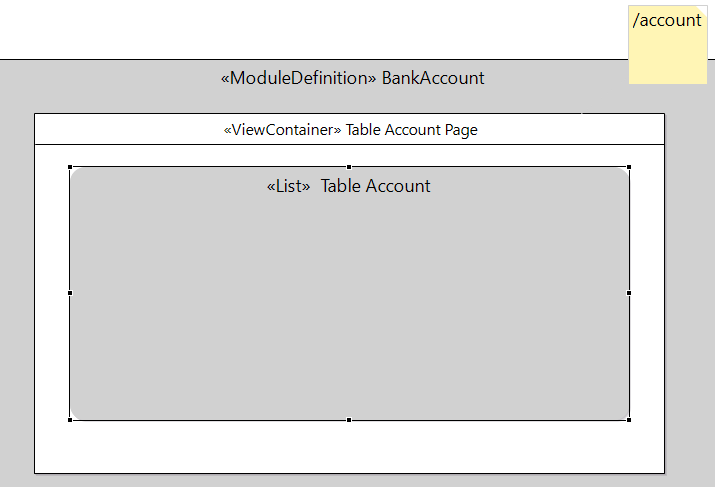
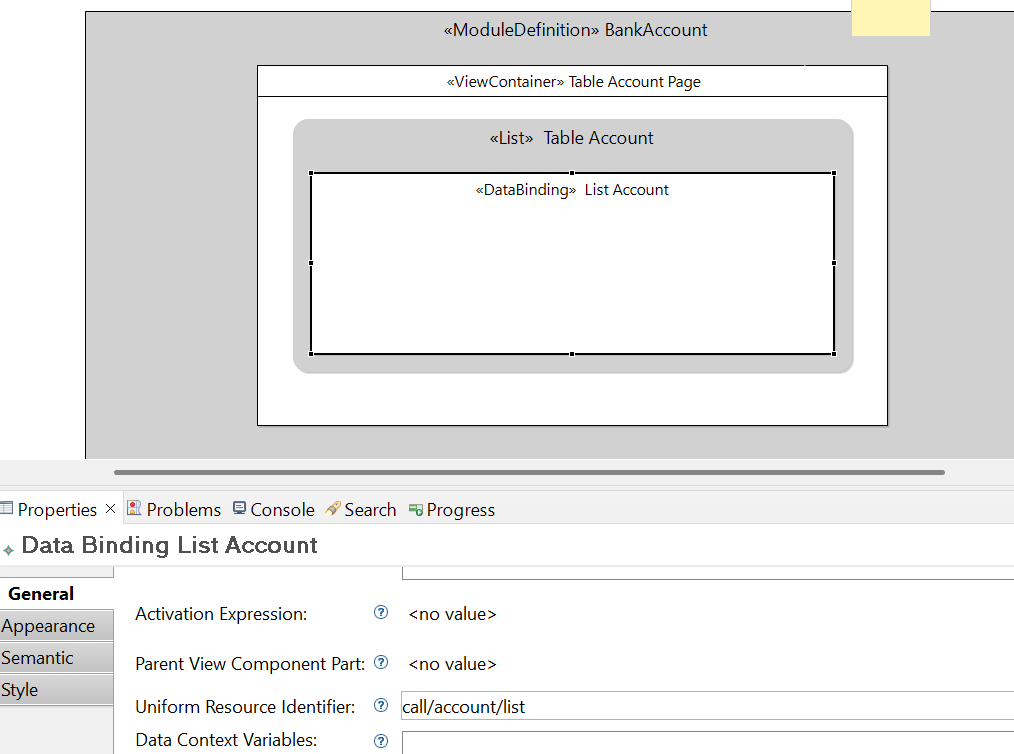
Create a Table Account View Container and fill it with a
List and DataBinding that
call the backend API. Make sure the View Container name starts
with "Table". In the same View Container, add the annotation
"/account" to define the page URL.
![Account Table]()
![Data Binding]()
-
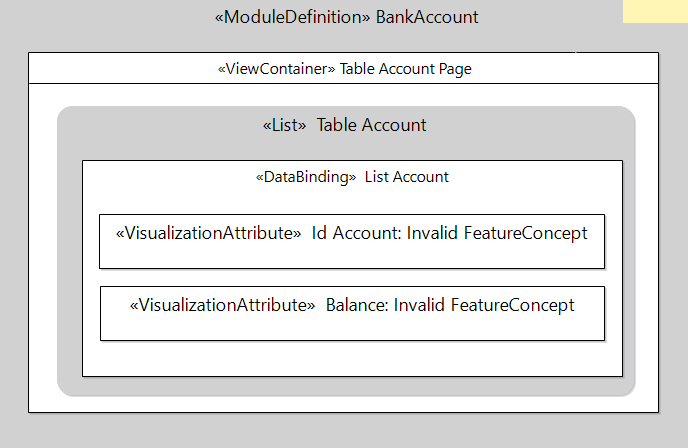
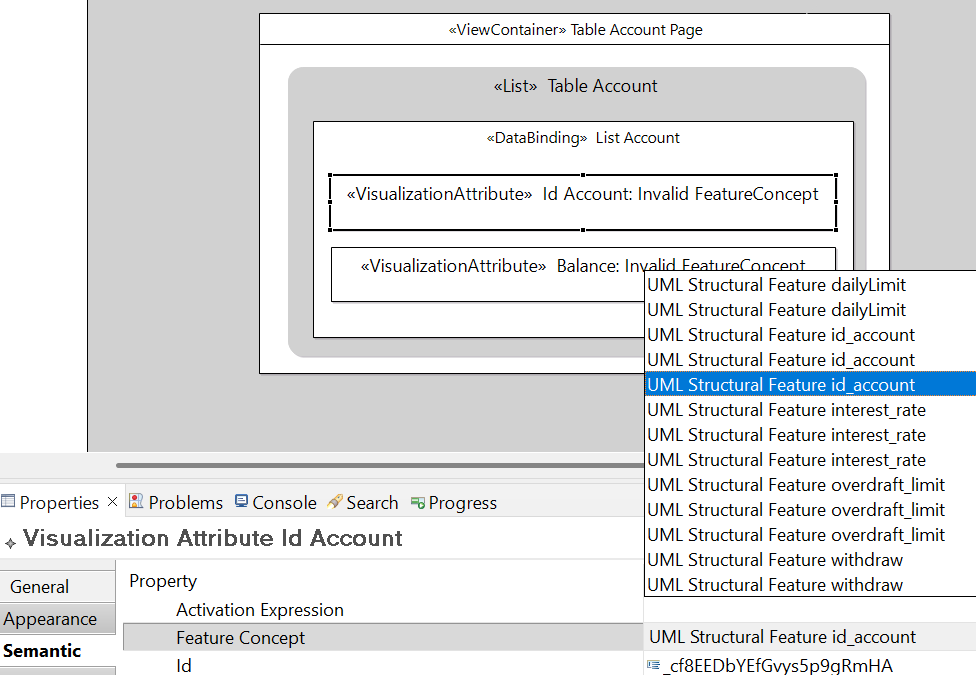
Add a Visualization Attribute to display the
data. This component needs to be added inside the DataBinding.
Go to Properties > Semantic and select the
feature concept based on the UML model.
![Visualization Attribute]()
![Semantic Properties]()
Create Navbar
-
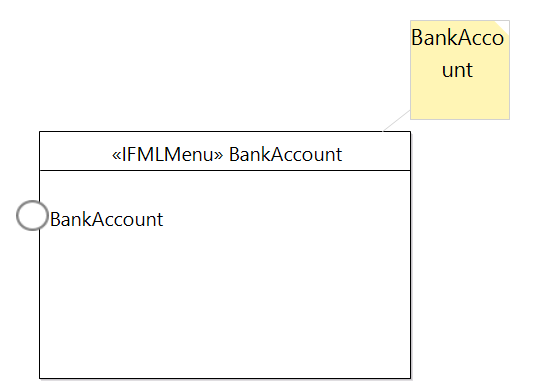
Open file main.core and add an IFML Menu for BankAccount to for the navigation to
"BankAccount" Page. Add the annotation of the feature's
name (BankAccount) and the ViewElement Event of the BankAccount.
⚠ Note: The menu and annotation name should exactly match the feature name.
![IFML Menu]()
-
Add Input Port Definition to define the
modeling interaction points from outside the ModuleDefinition.
![Input Port Definition]()
-
Integrating the Module into the Main Core:
- Double-click the main.core
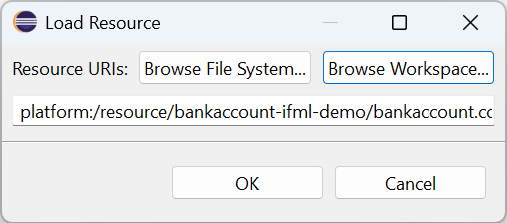
- Right-click on Resource Set. Then, select Load Resource > Browse Workspace.
-
Select bankaccount.core.
![Load Resource Window]()
-
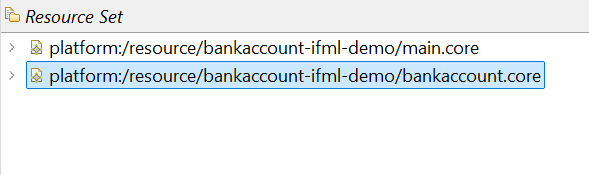
The result should look like this:
![Integrated Module Result]()
⚠ Note: This is just an example. Later, you will need to load resources not just in the main module but also within other modules if you use multiple modules. -
Integrating IFML Menu:
- Integrate the IFML Menu at main to Port Definition manually via navigation flow.
-
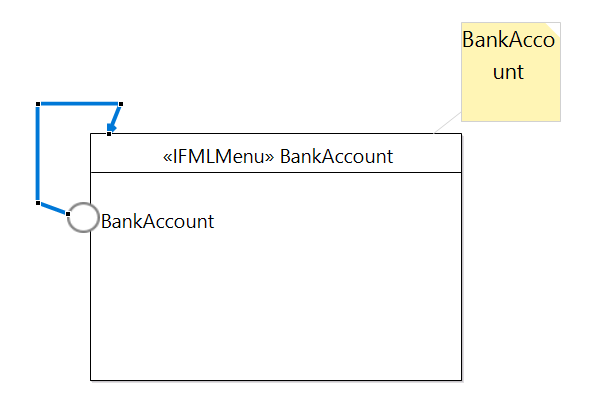
Create the navigation flow in IFML Menu back to itself.
![Navigation Flow]()
-
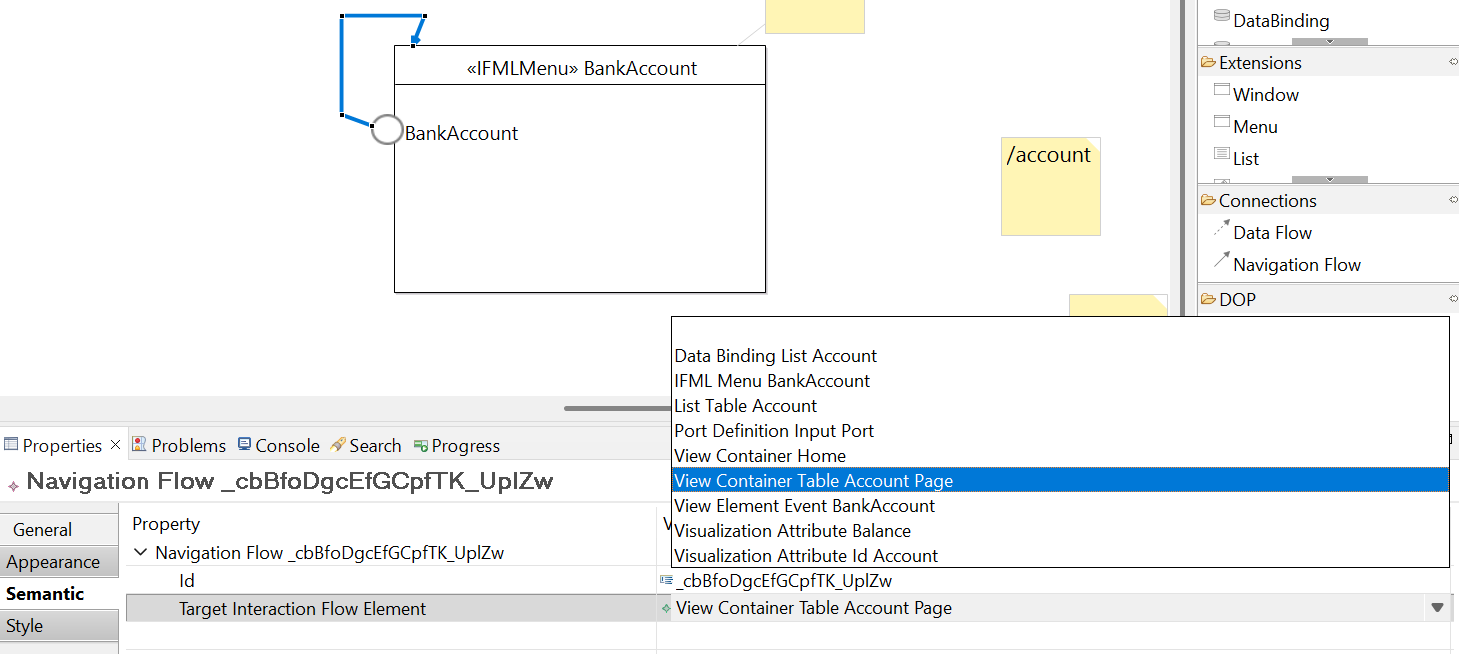
Change the target element in main.core tree to Port
Definition: ViewContainer Table Account Page
![Target Port Definition]()
⚠ Note: Once the target element is added, the navigation flow will disappear from the visual editor. Don't worry, the navigation flow is still present in the .core file (check by double-clicking the ViewContainer Menu in the main.core file). - Now, you can generate the UI from main.core using the plugin.
Create Form Page
-
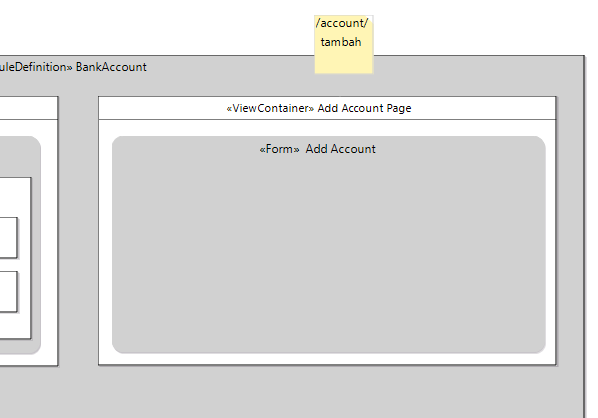
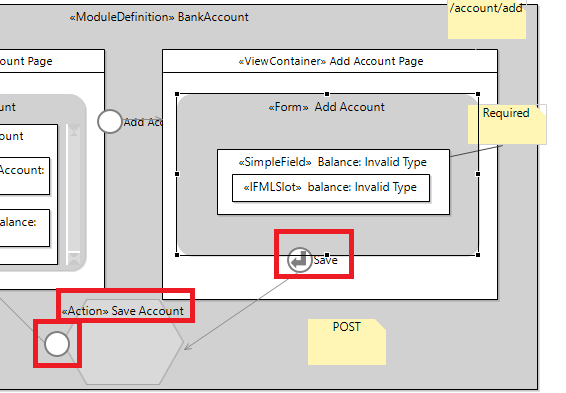
Inside the BankAccount page, create a new View Container and
fill it with Form.
![View Container and Form]()
-
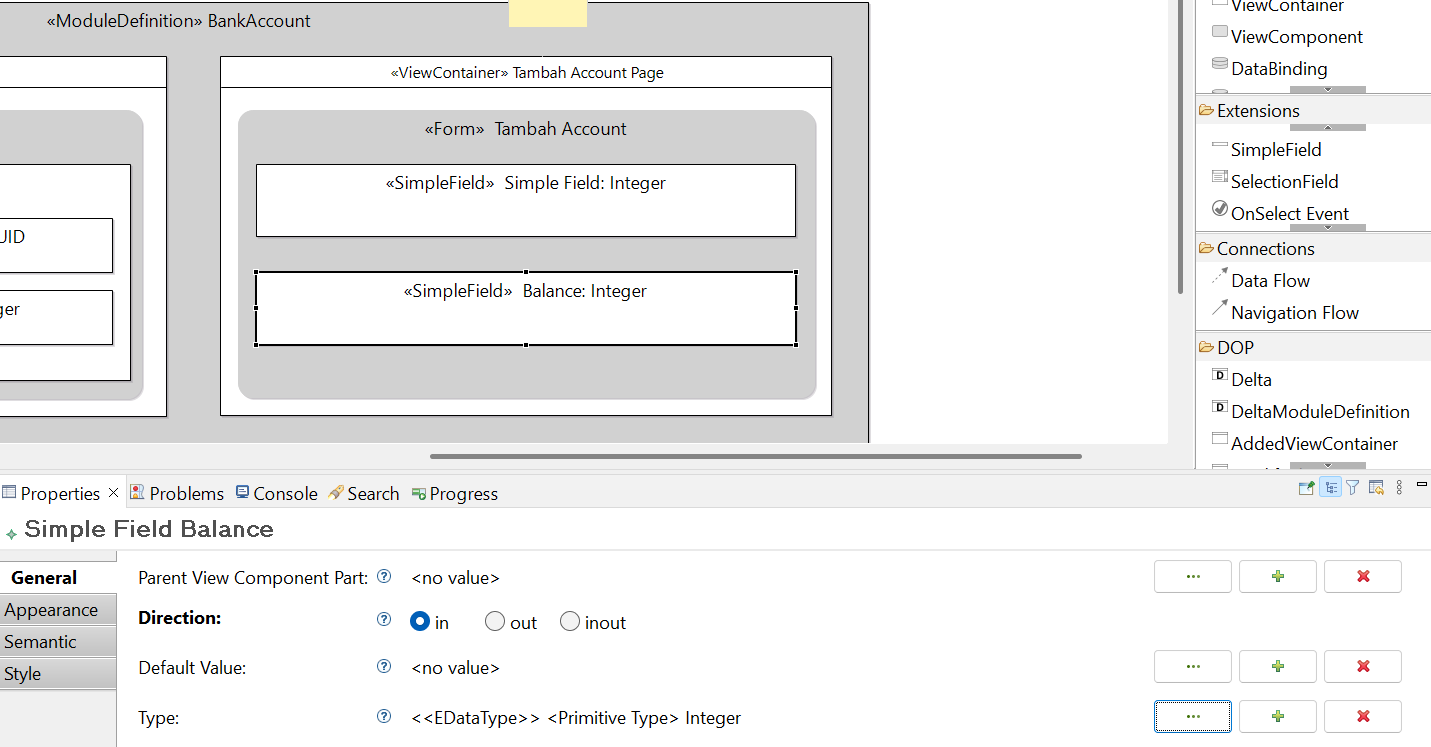
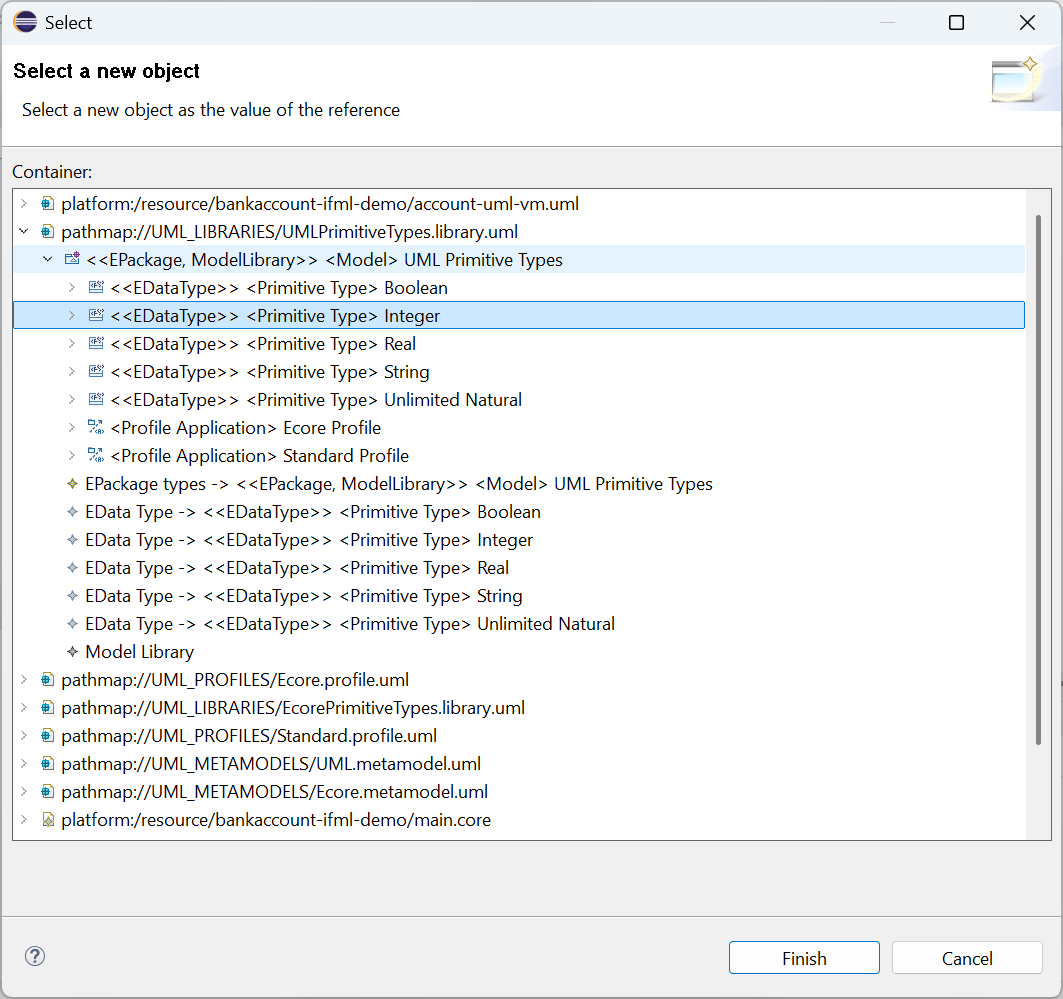
Next, fill it with Simple Field for the form's field and
update its type value.
![Add Simple Field]()
![Type Selection]()
-
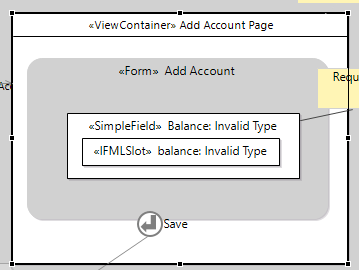
Inside the Simple Field, add IFML Slot. For
marking required field, add annotation "Required".
![Slot and Annotation]()
- For submitting the form, create IFML Action inside the BankAccount View Container with annotation "POST".
- On the Form, add On Submit Event and attach it with Navigation Flow to the IFML Action.
-
Lastly, add Action Event into IFML Action and add Navigation
Flow to Account Page
![Complete IFML Action]()
-
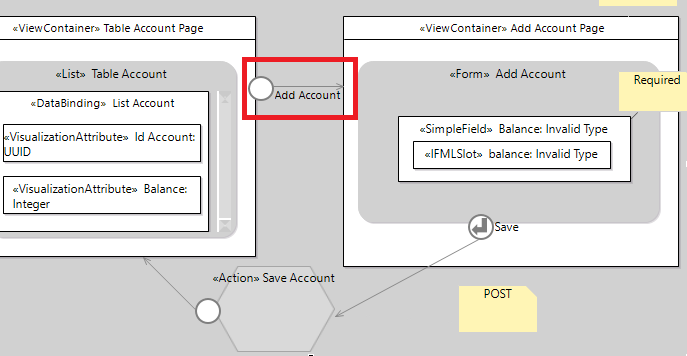
To allow access to the form page from the Account Page, add
View Element Event and navigate it to Form
Page.
![Navigation to Form]()
Transfer Parameter
- To create a detail page or an edit form page, the account ID is needed, so it needs to be passed from the list page.
-
First, create a new View Container for Account Detail. Set
annotation to
/account/:id_accountand DataBinding to callcall/account/detail.![Detail Account]()
-
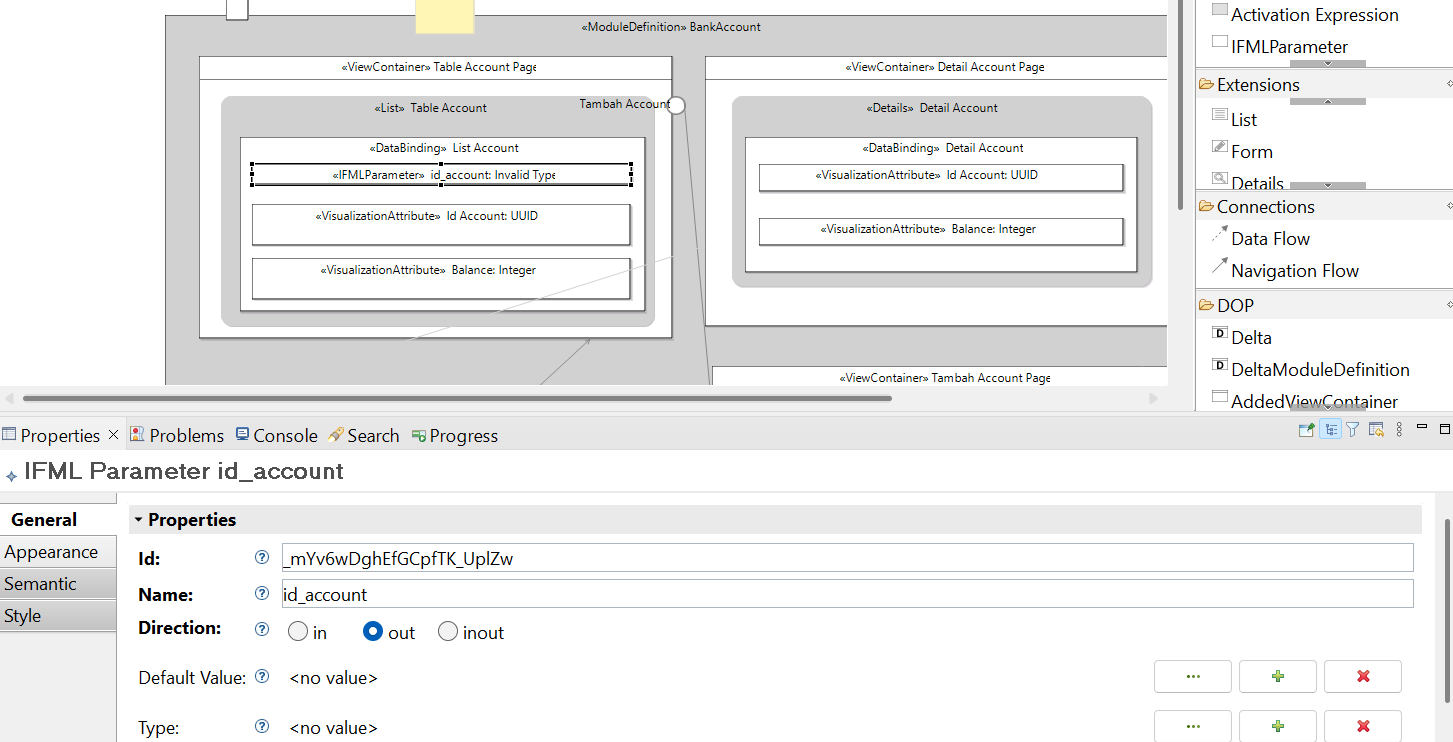
Next, create IFML Parameter with the name "id_account" inside
the Account Page Data Binding and set the direction to
out. In the Detail Page, create IFML
Parameter with the same name and set the direction to
in.
![IFML Parameter]()
-
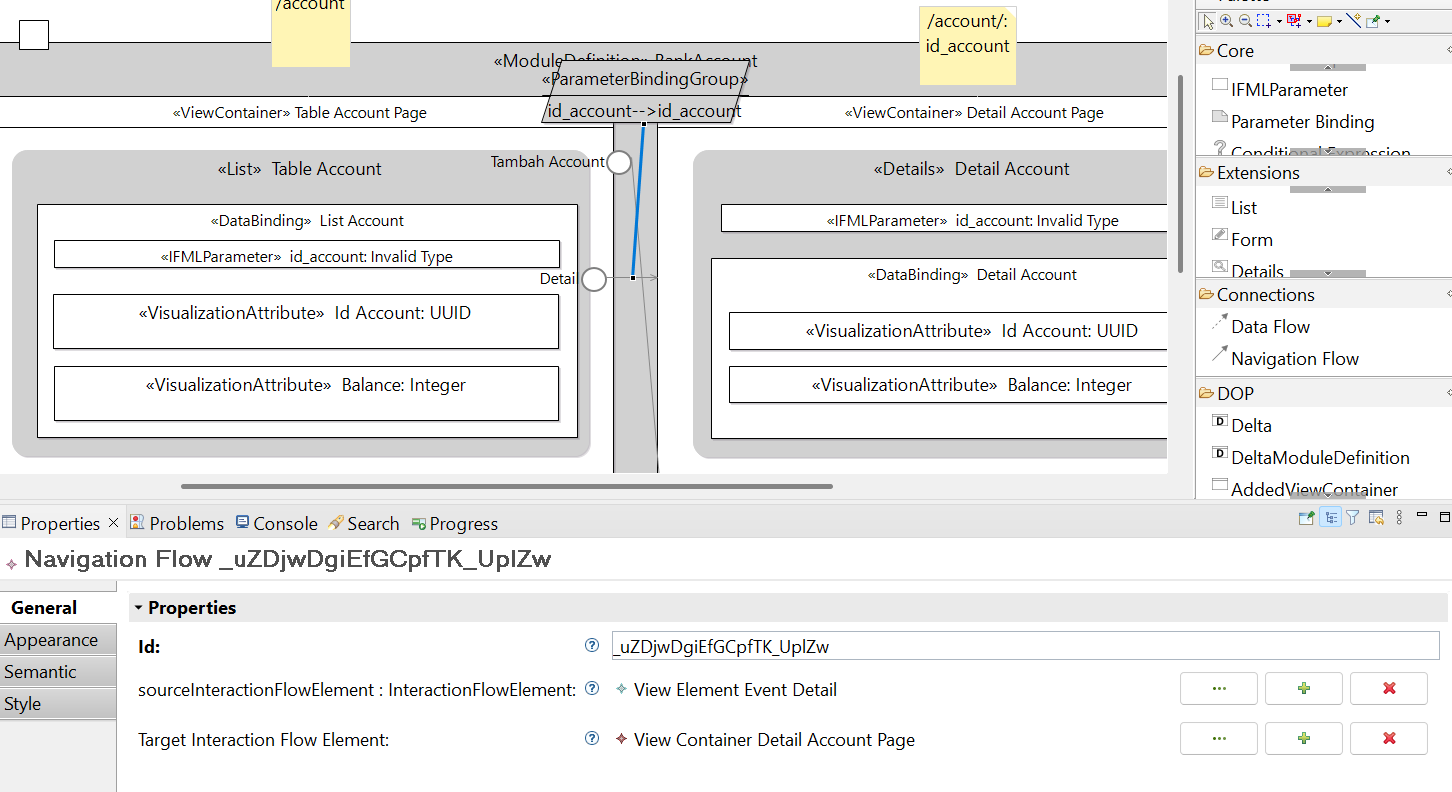
To transfer the parameter, create a Navigation Flow to Detail
Page and create Parameter Binding Group by right-click on it.
Fill it with Parameter Binding and set the source and target
value to the IFML Parameter.
![Parameter Binding Group]()
- By doing this, the data shown on the Detail Page should be the data from the selected account. The steps also apply to delete item and update item.

Create Delta Module (Overdraft Page)
-
Create a Delta (for variability features such
as Overdraft inside the ModuleDefinition) as
overdraft.core -
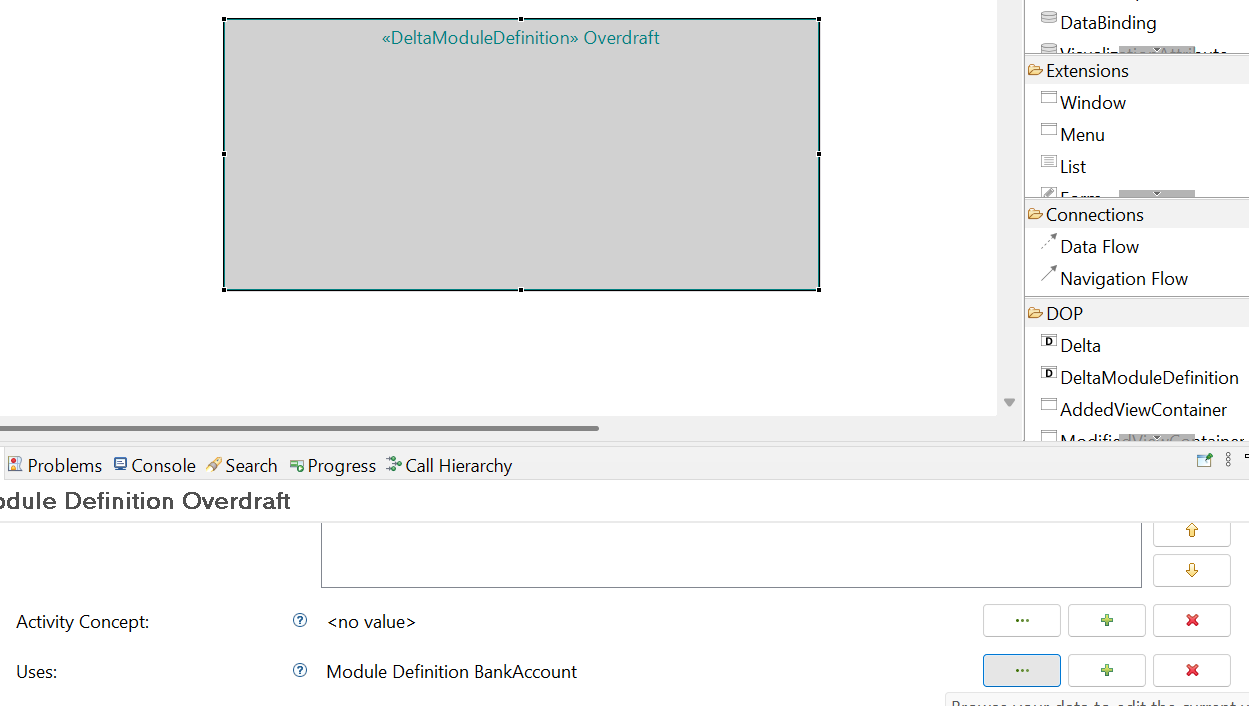
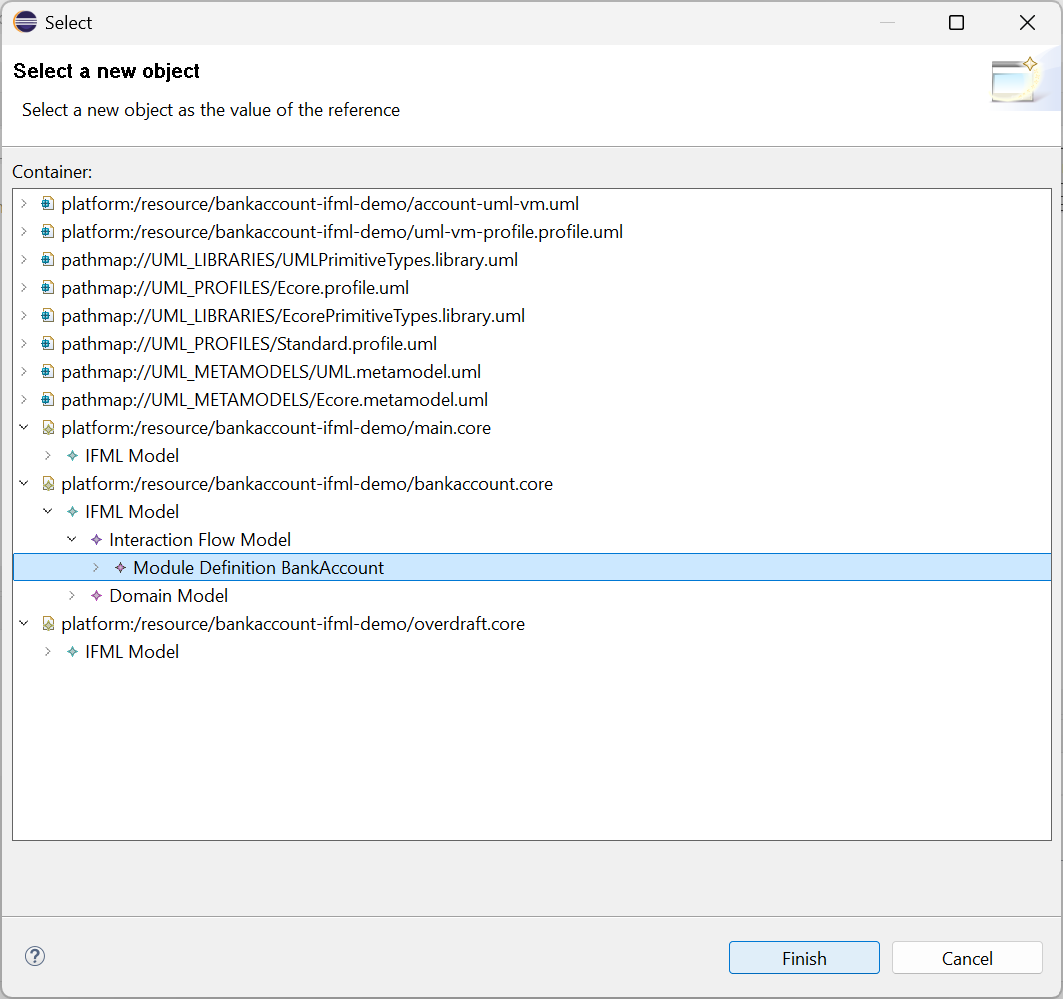
Inside the Overdraft, create a new
DeltaModuleDefinition named
Overdraft and set the
Uses variable to the targeted
ModuleDefinition (BankAccount).
![DeltaModuleDefinition]()
![Delta Uses parameter]()
-
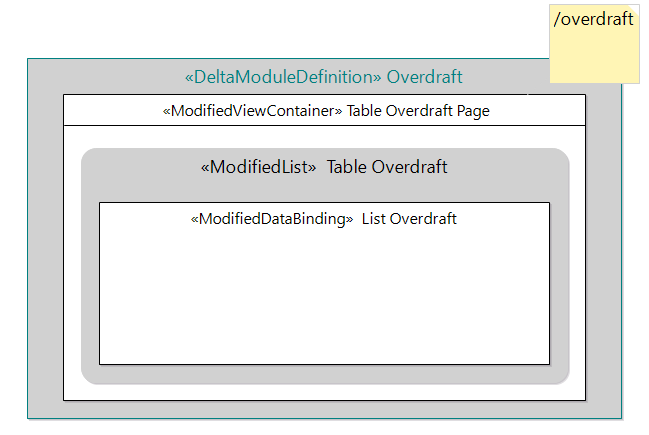
Next, create a new ModifiedViewContainer and
make sure to fill the Uses variable (View
Container Table Account Page). Also add an annotation
/overdraftfor the URL.![Delta Overdraft]()
-
Follow the same steps you used to create the Account Page
(Table + List + DataBinding + Visualization Attribute) but use
the DOP extension instead. Make sure to also
input the modifies value.
![Modifies Table]()
-
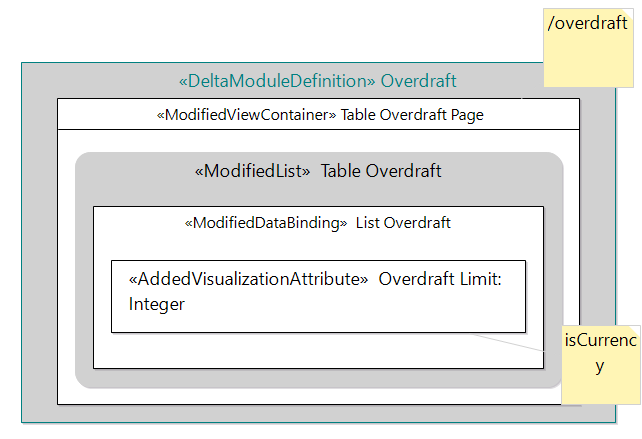
Add a new Visualization Attribute with
annotation isCurrency.
![Added Visualization Attribute]()
-
To generate the Overdraft feature, add
“Overdraft” in the
SelectedFeature (this can be done in
main.corewhen configuring the module usage). For adding the navigation to the new Table Overdraft Page, follow the same Navigation Flow steps used earlier.