Creating a Feature Model
This part of the tutorial will guide you through creating your first feature model.
Edit the Feature Model
Now it’s time to create a feature model specifying the features and their valid combinations.
-
Step 1: After creating the project, FeatureIDE opens the
model.uvlfile. A graphical editor displays where you can edit the feature model for your software product line. -
Step 2: Create two additional layers under your root feature. Right-click the root feature and select Create Feature (below) twice.
Rename the first new feature to Hello and the second to World. Rename features using
F2, single-click, or right-click with the context menu option. -
Step 3: Rename
Baseto Beautiful and move it between Hello and World. Create a feature named Wonderful and place it between Beautiful and World.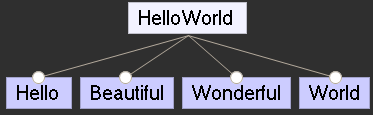
-
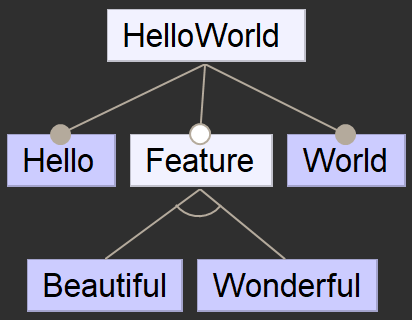
Step 4: Make Beautiful and Wonderful mutually exclusive by selecting both features, creating a new compound feature above them, and naming it Feature. Mark it as abstract from the context menu.
-
Step 5: Define connection types:
- And-group: No arc.
- Or-group: Filled arc.
- Alternative-group: Unfilled arc.
In And-groups, children can be mandatory (filled circle) or optional (unfilled circle).
-
Step 6: Double-click the connection below Feature to change it to an Or-group, then an Alternative-group. Mark Hello and World as mandatory. Click the help button to view the completed model.
-
Note: This is just example of feature modelling